• HOME
  • Portfolio
  • Club CreatingYOU.®
  • About
  • Cookbooks
  • Blog
  • Search

Lori Rice

Photography | Styling

  • HOME
  • Portfolio
  • Club CreatingYOU.®
  • About
  • Cookbooks
  • Blog
  • Search

Self-Portrait Tips When You Don’t Like To Be in Front of the Camera

Self-portrait tips

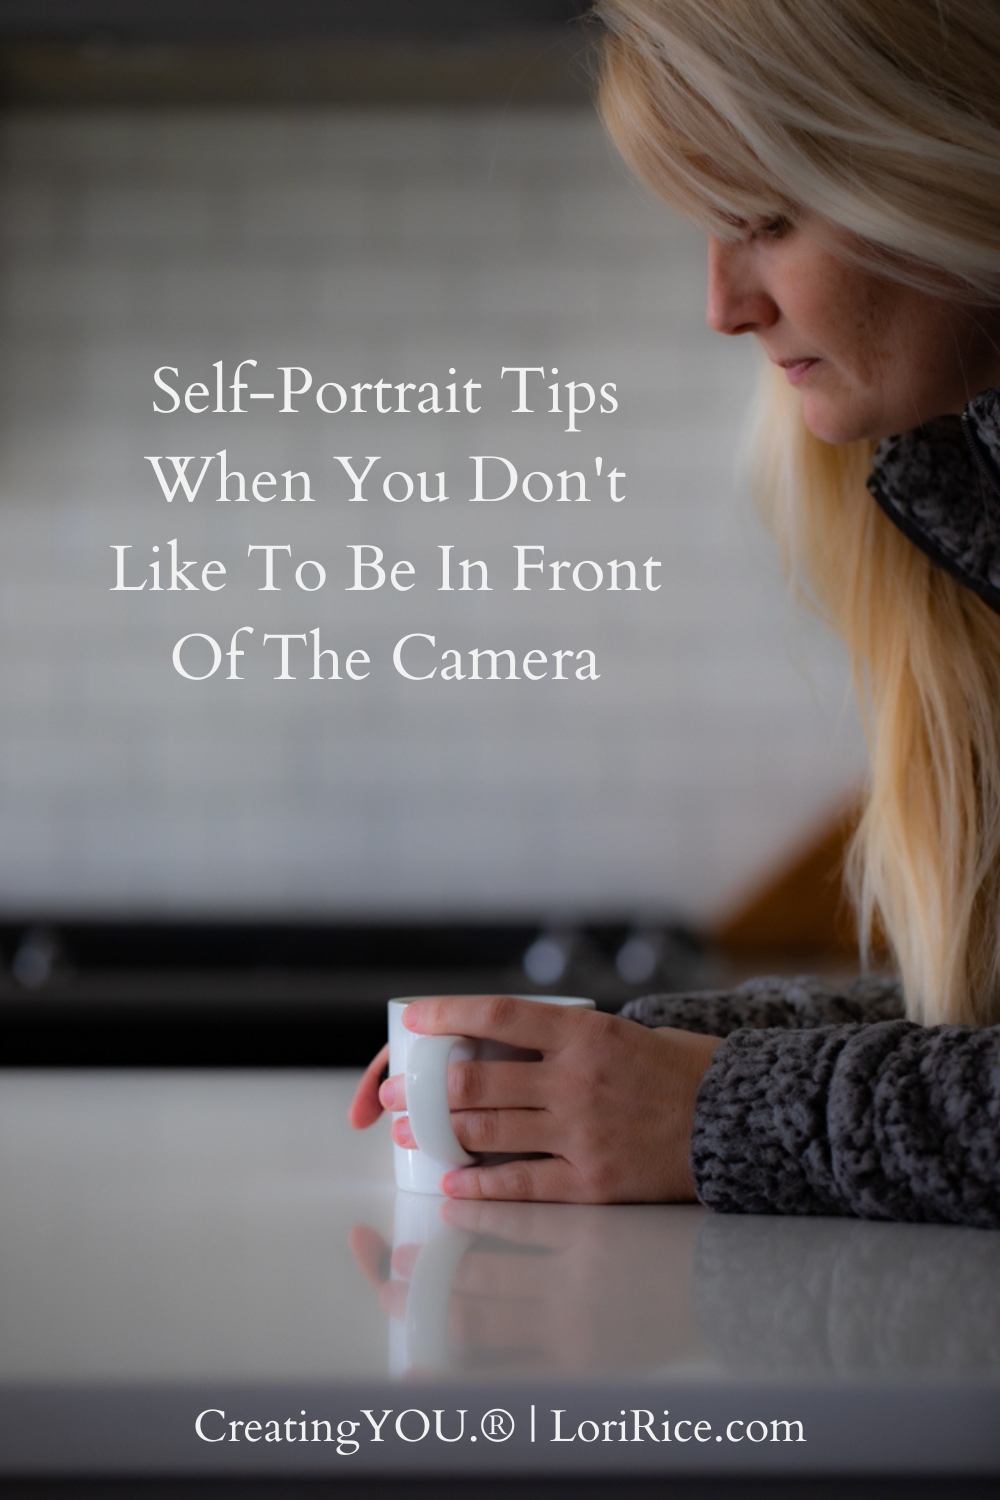
I rarely put myself in photos. I have no problem filming myself talking and posting it all over my courses and on social media, but still photos aren’t my thing. 

I don’t know why. It’s kind of weird that I don’t weigh both equally. 

But last year I followed a prompt to take a few self-portraits. I didn’t want myself front and center so I found ways to incorporate myself without being the focus. 

Taking them helped build my skills in idea generation and choosing a hero in the image. The results gave me a few creative lifestyle images to add to my portfolio. 

Here are some tips I learned from the experience:

Focus on the backdrop. Find an interesting subject behind you. It was subway tile for me. Let yourself be only in a portion of the photo. 

Photographer Lori Rice Self Portrait


Hide behind something.
If you don’t like full body shots, leaning forward towards the camera on a table or countertop is definitely an option to experiment with. 

Photographer Lori Rice Self Portrait


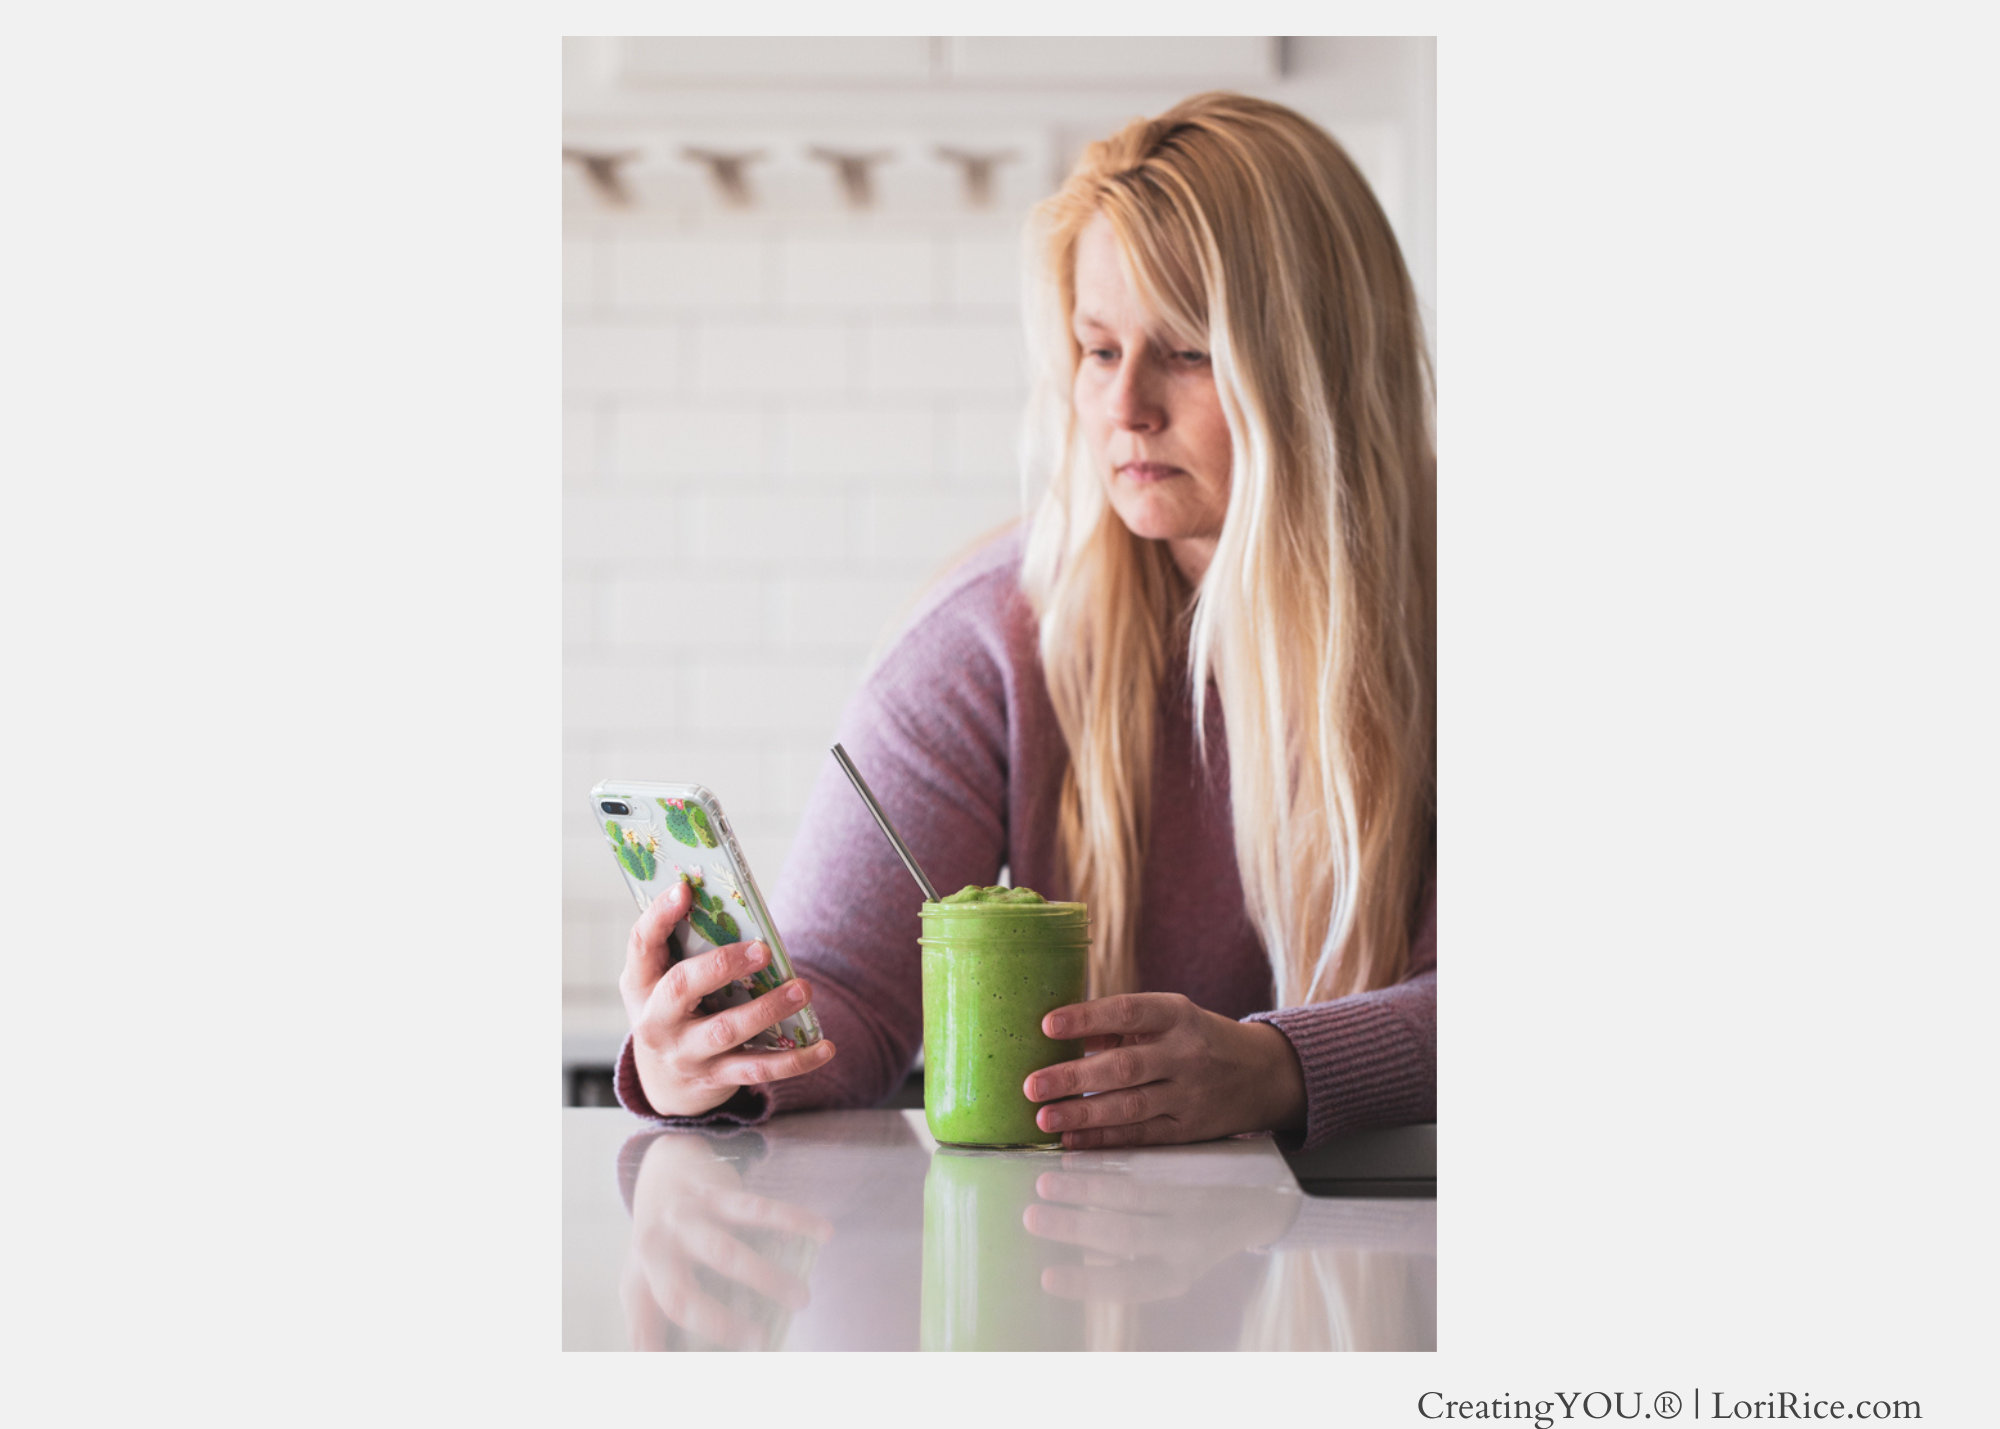
Shoot down.
Viewing yourself from above with more focus on an action rather than you is a good way to capture yourself without being the center of attention. 

Photographer Lori Rice Self Portrait


Self-portraits are something that I’m working to get more comfortable with and these were a good start. As I think of more ideas, I hope to do more shoots and will share more tips with the experience.


Hop on the CreatingYOU.® email list for my best photography and styling tips each week.
tags: self portraits, photography tips
categories: Photography Tips
Thursday 08.18.22
Posted by Lori Rice
 

Five Ways to Photograph Bread

Five ways to photograph bread by Lori Rice

With over 10 years spent being a food stylist and photographer, one tends to gather a lot of photos of the same subject. It’s fun to look back at all the different ways I’ve managed to style and photograph the same type of food - a soup, cookies, and bread, for example. And I find that sharing these photos is a good way to help spark ideas in others who feel stuck.

In my recent post Idea Generation: How to Brainstorm Ideas for Food and Product Photography, I shared that coming up with new ideas seems to be one of the biggest challenge many people face. (If you feel that way, be sure to read that post.)

This challenge is never greater than when you are tasked with styling and photographing multiple photos of a single subject at one time. 

When I wrote and photographed my cookbook, Beer Bread, I was definitely feeling those creative blocks.

But it was also a lot of fun. The challenge lead to some ways of thinking that hadn’t come to me before. 

These are some of my favorite five ways to photograph bread with photos from that book. 

Inside the loaf. 

No need to cut multiple slices. Just give us a peak inside that beautiful loaf. 

Photograph bread inside the loaf

Whole loaf in the pan. 

A simple idea, that is often forgotten. Show the bread inside the pan and resist the need for a lot of propping around it. Use a surface you love and let the loaf shine all on its own. 

Photography Bread loaf in the pan

Slices neatly stacked. 

I love how these shots show the inside while also inviting you to reach over and grab a slice. 

Photograph bread slices stacked


Slices scattered. 

Give the photo the casual feel of a snack board and scatter the slices. 

Photograph bread slices scattered

Whole loaf overhead. 

When the bread is a pretty loaf, let it be. Give the scene some color and let the loaf stand on its own. Or…

Photograph bread whole loaf


Slices folded over.

A little bonus with a sixth idea, because this can really only be done with the right loaf. For large round loaves that allow for big, long slices that tend to flop over. Keep the slices tightly intact at the bottom and let them gently unfold out of the loaf. 

Photograph bread slices folded over


Need more ideas? Be sure to grab the creative guide - 10 Ways to Photograph Banana Bread
tags: food styling, photography tips, baked goods
categories: Photography Tips, Styling Tips
Wednesday 08.10.22
Posted by Lori Rice
 

Tips for Flower Photography and Floral Design

Tips for Flower Photography

One subject that I’ve enjoyed working with more in recent years is flowers. There are so many ways to capture them, so many tones and moods you can set with them.

Of course, I’ve incorporated them into my food photography. 

Through edible flowers. 

Edible Flowers Lori Rice

And with dried lavender when it’s been in a recipe. 

Lavender Lemonade Lori Rice


But photographing flowers in the wild, on farms, and in arrangements has been a new challenge that I absolutely love. 

I’ve had the opportunity to teach about flower photography and I’m thrilled that I’ll be co-teaching an in-person workshop this September with Alicia Schwede at her Fleurs Creative studio in the Historic Downtown Snohomish, Washington outside of Seattle. 

You know her on Instagram as Flirty Fleurs and her skill in floral design is unmatched. What she creates is absolutely stunning. 

It’s hard to tell if I’m more excited to help people photograph the beautiful creations she helps them make or about the opportunity to be able to photograph them in her beautiful studio. It’s in a 100+-year-old building with all the historical touches, like exposed brick, that you’d expect! 

In preparation for our teaching together, I asked Alicia if she had three tips for floral design and prep so that I could pair those with my three trips for photographing those creations. 

Here are her tips:

Remove foliage that will be below the water line. By doing this you'll keep the water cleaner as foliage under water creates an environment where bacteria grows.

Trim stems at an angle. By trimming at an angle there is more surface area to take up water and rehydrate the blooms.

Use a clean vase. Between uses be sure to clean the vase out with soap and hot water to remove any traces of bacteria. This easy step will ensure longer-lasting flowers.

And once you have your beautiful, long-lasting arrangement together, here are a few of my tips for capturing its best qualities.

Know your photography style. Flowers look great in bright, vibrant settings, with muted, comforting tones, and with dark, drastic contrasts. What are you going for? Knowing this helps you control your light, set your camera, and prop your set. 

Flower Photography Lori Rice


Turn your hero spot towards your light.
Even with a large arrangement, pick a hero spot as your point of focus. Then turn that towards your light source, not away from it.

Photography tips Lori Rice


Move yourself to capture all angles.
Flower photography is not the time to strap yourself to a tripod. The best shots often come from unexpected angles. And that comes from moving yourself and the camera.

Flower Photography Angles Lori Rice
 

Want to join us in-person on September 6, 2022 at Fleurs Creative?

Learn more about the Flowers and Photography Workshop
tags: flower photography, photography tips, photography workshops
categories: Photography Tips, Photography Workshops
Saturday 08.06.22
Posted by Lori Rice
 
Newer / Older

Our Privacy Policy and Terms of Sale. ©2025 Fake Food Free Productions, LLC.