• HOME
  • Portfolio
  • Club CreatingYOU.®
  • About
  • Cookbooks
  • Blog
  • Search

Lori Rice

Photography | Styling

  • HOME
  • Portfolio
  • Club CreatingYOU.®
  • About
  • Cookbooks
  • Blog
  • Search

Styling a Spring Brunch Photoshoot

One scene I wanted to photograph for my most recent book, The California Farm Table Cookbook, was a spring brunch. In addition to the book highlighting food producers, I included a small flower producer, Laurie, who is now a friend. This brunch allowed me to show off her beautiful floral arrangements in the book. 

Laurie invited me to her backyard where she grows her flowers for her arrangements. Here, we set up a spring brunch scene. She put together some arrangements for the table. I prepared the foods from the book and drove the 2 ½ hours to her home in California’s Central Valley bringing along props, linens, and my gear. 

First, we have the flowers. While the food was important, this was the part of the book where I was highlighting Laurie and her work so they needed a prominent place in the photo. 

In our planning call, I shared that I liked long stem, earthy, wabi-sabi style arrangements and we selected her vintage vases together through texting photos. 

Laurie loves a peach color palette so I told her to create what she loved. I planned to keep plates white or light and linens neutral so I knew I could make whatever I needed to work with the color palette she chose. These were the flowers for the shoot:

I brought a table and surfaces, but she had this vintage desk that she often photographed her flowers on. We moved that to the yard and things began to take shape. 

The foods I wanted to include from the book were: 

Sliced Chicken Salad in Curry Dressing
Garden Deviled Eggs 
Candied Walnut, Citrus, and Fennel Salad
Lemon Pistachio Scones

I had to travel the distance to the shoot so I selected only cold picnic foods that I knew would hold up both through the travel and the styling time. I made them all the night before the shoot and garnished on set. 


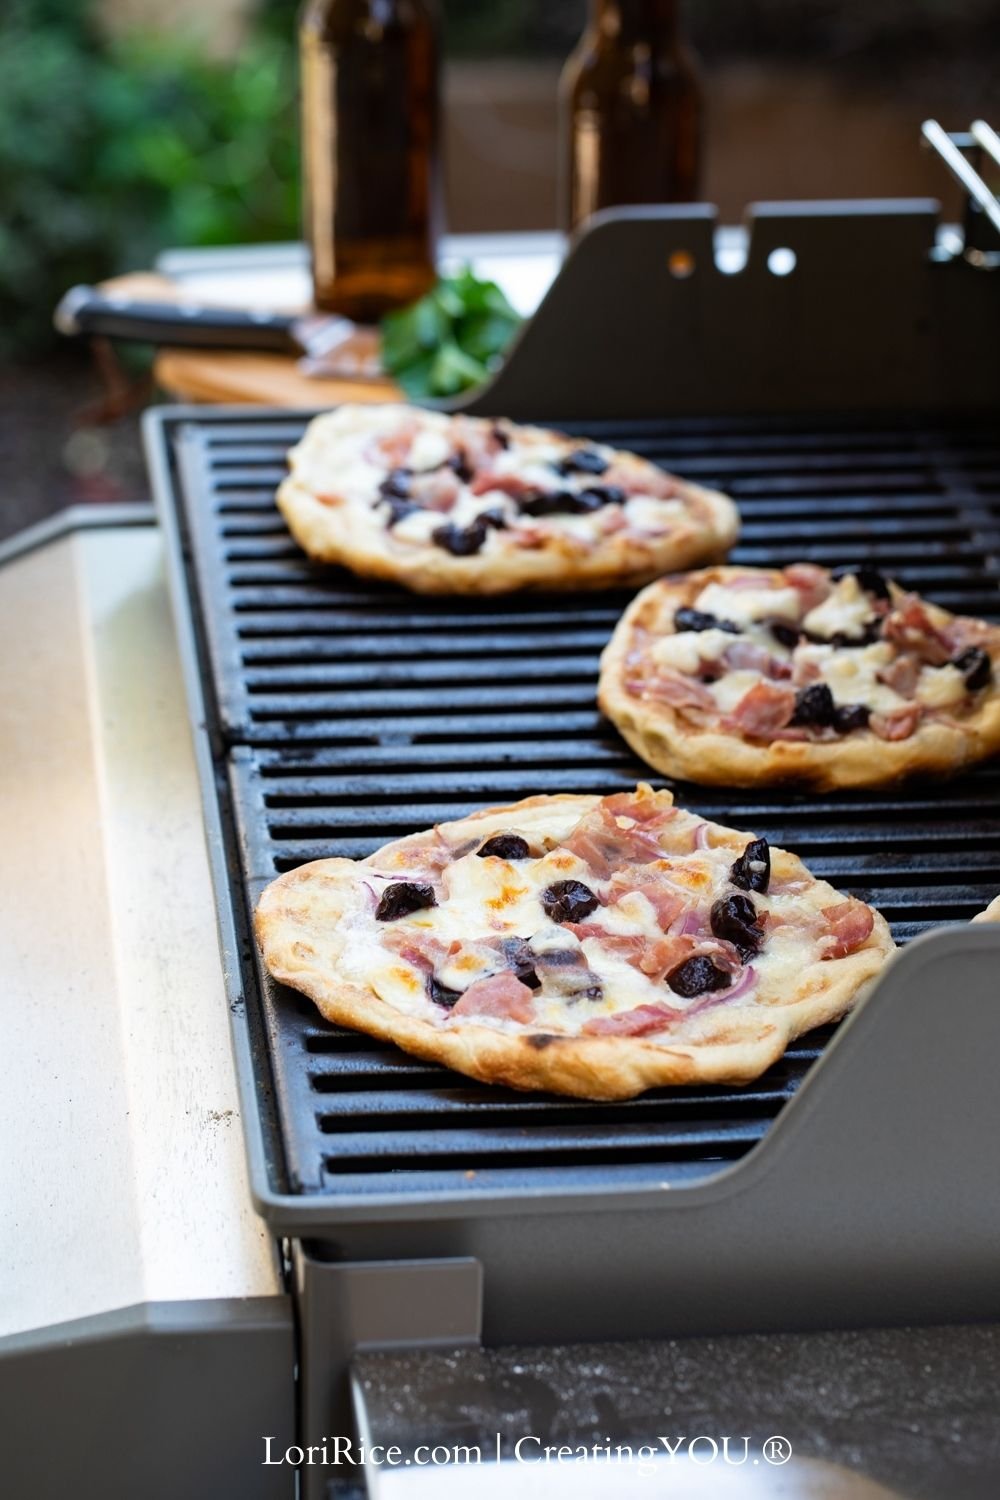
Side note and a tangent: My original plan was to include my Deep-Dish Artichoke Bacon Quiche in the brunch shoot. It was my number one pick. It turned out that the day I was supposed to prep all the food, my husband hurt his back and I spent all day in the emergency room. I came back to my kitchen in the evening and stayed up most of the night prepping the food to leave early the next morning. My point? It’s important to be flexible when doing this kind of work for yourself. Always have a plan B. It turns out the photo worked just fine without the quiche. 


I brought a few garnishes like chives and cilantro with me, but Laurie had some gorgeous edible flowers blooming at the time of the shoot. We used these to garnish the deviled eggs along with the chives I had and added some cilantro flowers to the chicken salad.

I thought ahead of time what serving bowls would work well with the food and brought a few extras to choose from in case I thought otherwise on set. Once we had that table, I knew the table runner I brought wasn’t needed. With the table and flowers, everything else needed to be simple:

A mug to hold utensils.
A stack of linen napkins.
A stack of different-sized serving plates.
Some serving utensils. 


Note:  I have one full set of plates that I purchased from a ceramicist several years ago. It includes four each of large, medium, and small plates. While I don’t buy multiples of a lot of things, investing in and having this large set has been really great for scenes just like this where a coordinating stack of plates is the best option. 


I also had to make sure that whatever angle I chose only got the green grass and not all dirt of the garden. Of course, this could be filled in during editing, but it was easier to do my best to capture only the grass in the frame. 

I started with a setup for an overhead shot. We moved the table a few times as I worked so that we could get some soft, dappled light through the trees.

I like the photo and I did submit it for consideration by the art team, but it didn’t highlight the flowers enough for me. I didn’t know how I’d feel at the time of the shoot, so I took many angles. This shoot was only going to happen once and I wanted multiple options to choose from. 

An angled shot was much better at showing off the flowers. I submitted this one, too, but had to admit that the chicken salad was not my favorite dish on the table. 

The photo that was finally selected was this one with the eggs as the hero. I felt they were much more attractive than the chicken salad and worked better with the flowers. While all the arrangements are not in the frame, the ones that made it in frame are striking. The touch of floral landscape in the background works well, too. 


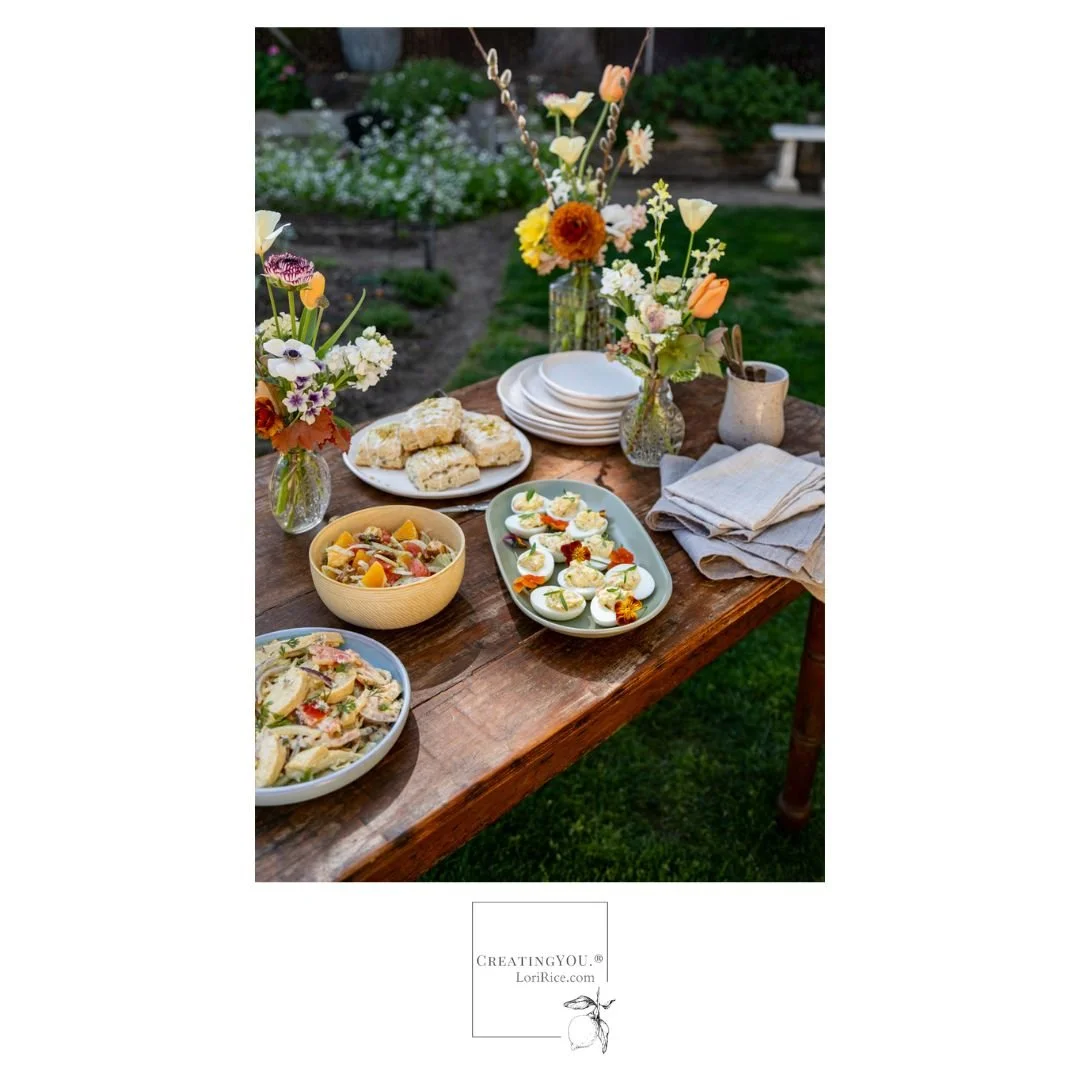
Another note: Each of these recipes is in the book with their own photo. I allowed enough time to photograph three of them the same day as this shoot because I wanted the backgrounds and props to coordinate in the book between the recipe chapters and the final menu chapter where this brunch photo is featured. 


This is how it came together in the book:


Questions? I’m happy to answer them. 

tags: food photography, food styling, cookbooks
categories: Styling Tips, Photography Tips
Tuesday 02.25.25
Posted by Lori Rice
 

Styling Pies for Food Photography

There are so many styles of pies. Flat, rustic crostata and galette styles. Inches-thick fillings and meringues. There are multiple ways to tackle them depending on the style you are working with. 

Thanksgiving is coming up here in the U.S. which is essentially pie season. I’ve photographed a lot of pies and tarts, specifically for my cookbooks. These are my best tips for working with these desserts along with some photos sprinkled in for inspiration. 

A favorite pie from a creative project. It took forever to style, but I share the photo of it often.

  • First, if you have control over the recipe focus on the top. The more detail the better - crumble, lattice, piped meringue, layered fruits. Even if your pie doesn’t set up or look as nice on the inside, you’ll still get some lovely detailed shots of the dessert whole.  

  • Practice patience. If you need a shot of the interior, give the pie all the time it needs to cool and set up. Rushing this step is a recipe for frustration. Consider letting it sit overnight if necessary.

  • Go overhead for flat pies and galettes. Stacked plates can help elevate the subject. 

The acorn squash galette in my cookbook, the California Farm Table Cookbook. Slightly stacking plates helps separate multiple subjects from each other. Different colors of plates help, too.

  • Thickly filled pies make beautiful slice shots. Lower yourself and your camera to focus on the height of the pie. Ensure enough light is on the filling itself. 

The deep dish quiche on the left from my book allows for a great filling shot. The pumpkin pie on the right is shorter but with a firm filling that holds well. Both have plenty of light on the filling, highlighting it for the viewer.

Crostata photographed at the breakfast table during a workshop in Italy. Backlight works well with the lattice top.

  • Backlight works for whole pies and especially catches the light on toppings. 


  • Keep styling simple. Pies are large subjects that deserve attention. Let them have it. 

  • Slightly pulling away a slice or slicing the pie, but keeping it whole gives you another option that is halfway between the whole or single slice decision.

The tart on the left is from my cookbook Food on Tap and the one on the right is an outtake from a pie in my book, The California Farm Table Cookbook.


New here? If this is our first introduction, maybe you’d like to know a little more about me, my work, and how I can help. You can always check out my About page at LoriRice.com, here are some recent articles I was featured in. It’s great to meet you!

 From Science to Art at Faire Magazine

The Writer Behind the California Farm Table Cookbook by Georgia Freedman


Build some skills before the holidays. Take a look at my FREE trainings and PDF guides.

CreatingYOU® Free trainings and Guides
tags: pies, dessert, food styling, food photography, holidays
categories: Styling Tips
Monday 11.18.24
Posted by Lori Rice
 

Food and Product Photography Props for Styling Holiday Season Photos

Most photos start with the subject. But when I get stuck in a rut, constantly grabbing for the same prop over and over again, I find reversing the process so helpful. This is especially true during the holiday season. I gather every prop I want in the scene to create the mood I envision and the finally place the subject last.

It’s a great way to use props you’ve had forever, to discover the unexpected that is sitting around the house, and to decide what you truly need in a collection.

These are a few of my holiday photo prop ideas. The things I keep around to style seasonal photo shoots for both food and products.

Old white painted stool - I use this all the time. Found at a church yard sale for $2.

Baskets of all kinds - larger baskets are ideal for setting on the floor and filling with seasonal items like blankets.

Blankets - you can’t have enough for fall and winter photos and I find IKEA a great place to get smaller, thinner options that are less bulky and ideal for stacking.

Bundles of fabric - with or in place of linens or blankets, buying clearance fabric in large quantities can create a seasonal look that can be stacked.

Dried greens, plants, and flowers of all kinds - Trader Joe’s is where I get most of mine and let them dry on their own, I keep the ones that dry well.


Wooden bowls - for a classic look that works from Thanksgiving to Christmas.

Vintage cookie cutters and baking tins - always a favorite for holiday scenes.

Rolling pins - vintage are nice, but I also like printed versions for holiday-specific photos.

Heavy linens - moving into heavier fabrics like tweeds and flannels changes the mood of a photo for a seasonal look.

In-shell nuts - I’ve written about this one before and I love them for holiday photos.


Mesh shopping bags - these look as great with fall produce as they do with naturally wrapped gifts sitting inside.

Dried leaves and small branches - I gather them when I walk and sift through my collection each year.


Fuzzy table runners - they don’t have to be intended for that, just buy a few yards of something soft and bulky from the fabric store or use a scarf.

Candle holders - I keep red and green around for the holidays.

Pinecones - another thing I collect on walks and from old arrangements and wreaths that are discarded each season.

Antlers - a natural set painted white is perfect.


Matte scrapbook paper - I think these printed papers work well as a substitute for wrapping paper in photos versus glossy paper.

Paper gift bags - I go with brown but matte colors work, too.

Natural twine - this works well with other natural props and dried elements.


Love doing lots of different things? Download the free guide that proves you don’t have to niche down your creative business to succeed.


tags: holidays, food styling, props, photo props
categories: Photography Props
Thursday 10.10.24
Posted by Lori Rice
 

Styling and Photographing Brown Foods

One of the biggest struggles in food styling and photography is working with brown, beige, and neutral foods. Those that don’t give you a pop of color or interesting detail to work with. It challenges me often and it’s one of things you tell me you struggle with most.

The most common culprits are mushrooms, grains, and meats, especially those with long cooking times, such as stew.

There are a few things that you must incorporate into your set-up to ensure the best possible photos for these foods. Then there are a few more to consider as you troubleshoot the best options for making these foods look as good as you know they taste.

You must garnish. I’ve never been presented with a plate of neutral, beige food that did not require a garnish. You are at an advantage if you created the recipe as you can add pops of color and texture as needed. If you are photographing the food for someone else, you have to dig into a discussion with the recipe developer about what could be used to garnish the dish, and what is it made of. Just be sure that the final recipe reflects anything that is added. It can be listed as optional.

You’ll see garnish examples throughout the photos in this post, but the most obvious are chopped herbs and sprigs. It can also be chili oil, olive oil, and flake salt. Think in terms of both color and texture that can catch the light.

You must create directional light. Your light source must be coming from one direction only to highlight the detail of any brown food. Block it from all other directions and be sure it is hitting your hero spot.

Give meat movement. Add tongs, a fork, a spoon. And don’t be afraid to crop a few shots tightly to show texture and detail.

White plates and brighter sets solve most of my problems with brown foods. They allow the focus to be on the food making it pop more than if it were lost on a competing colorful or dark plate.

Use backlight if you prefer mood. Not everyone wants that white, bright set. Backlight can create a moody image while also catching the texture of the food and creating interest to the eye.

Hopefully those tips will get you started. Combine a few of them and see what you can capture the next time you are challenged with a neutral food.


More freebies, please.

Featured
Copy of Copy of Diptych (15).jpg
Cameras and Tech, Photography Tips, Styling Tips
photography, styling
My Favorite Styling Tools, Travel Essentials & Camera Gear (Minimal + Proven)
Cameras and Tech, Photography Tips, Styling Tips
photography, styling
Cameras and Tech, Photography Tips, Styling Tips
photography, styling
Fall (7).jpg
Styling Tips
styling, food photography, summer
How to Style and Photograph Frozen Treats: Tips for Solo Food Photographers
Styling Tips
styling, food photography, summer
Styling Tips
styling, food photography, summer
5.jpg
Photography Tips, Styling Tips
flat lay, styling, food photography, product photography
Flat Lay Photography: A guide to styling from minimal to cluttercore
Photography Tips, Styling Tips
flat lay, styling, food photography, product photography
Photography Tips, Styling Tips
flat lay, styling, food photography, product photography
 
tags: styling, food styling, food photography
categories: Photography Tips
Friday 01.19.24
Posted by Lori Rice
 

Food Styling Tips for Pizza

Pizza. Flat. Round. Sometimes oblong. Sometimes colorful. Often little dimension. 

I love pizza in every form that I’ve encountered around the world, but the truth is, I’m not the biggest fan of styling pizza or photographing it. 

That doesn’t change the fact that my clients have me create and photograph pizza and flatbreads. I have also created it for my own cookbooks. Like it or not, I’ve had to develop some skills and styling tips for pizza throughout the years.

These are a few quick tips to help you style pizza and flatbreads. Some to think about before it hits the set and others to help it be its stunning self as you pick up the camera. 

Think about your garnishes before you take it to set. 

Sometimes when we look at pizzas we know there are so many good things tucked inside, but to the eye, it just looks like cheese. Think about what colors and textures you can add to the top to break up the monotony and make the subject sing for the camera. Fresh herbs, crushed red pepper, crumbled or shaved cheeses, cracked black pepper, flake sea salt, and ground nuts are a few ideas.

Pull a piece out.

Add some action and space between the sea of ingredients by moving some slices around on set. 


Overhead is nice, but don’t forget about 45-degree angles.

Overhead is often my go-to for pizza, but when it is piled with toppings for texture, an angled shot may turn out the be the winner. 

Elevate with boards. 

Pizza is most often flat. Give some distance between the whole pie or individual slices and the backdrop or surface. 

Add something to support the star. 

Pizza and beer are classic. But it might be wine. A bowl of crushed red pepper or a pizza cutter. When the pizza itself doesn’t have a lot going on for it, something added tightly in the scene can help complete the image.

Blacklight loves pizza.

Especially simple flatbreads where there is a lot of space that the light can catch. 

Change the set.

If your pizza is baked in an interesting spot - Outside, in a brick oven or on a grill - capture some of that scene. It’s so much more interesting than a pizza on a board.


Club CreatingYOU.® is a community exclusively for solo creative stylist-photographers who want to grow their skills for capturing food, drink, and its origins while cultivating a distinct style. It’s always open to new members. This month we’re covering surfaces as they relate to style in our training and photo breakdown. The supporting podcast comes out next week where we’re talking about that elusive style and if you need to try so hard to find it, based on the work you hope to do. Hosted on Substack by me, Lori Rice.

tags: styling, food styling
categories: Styling Tips
Friday 01.12.24
Posted by Lori Rice
 
Newer / Older

Our Privacy Policy and Terms of Sale. ©2025 Fake Food Free Productions, LLC.