• HOME
  • Portfolio
  • Club CreatingYOU.®
  • About
  • Cookbooks
  • Blog
  • Search

Lori Rice

Photography | Styling

  • HOME
  • Portfolio
  • Club CreatingYOU.®
  • About
  • Cookbooks
  • Blog
  • Search

My Favorite Styling Tools, Travel Essentials & Camera Gear (Minimal + Proven)

Let’s talk gear. (Spoiler: I keep it simple.)

I’ve answered questions about favorite tech gear, styling tools, and travel gear for years. It’s kind of wild that it took me this long to compile everything into a list. But—small biz owner life, I guess.

I’m happy to say it’s finally here, though, along with some examples of what I’ve used this gear to create. It’s organized into three sections: styling tools, travel and remote work essentials, and photography gear.

Now, if you're expecting a flashy list of just-released-yesterday tech... this probably isn’t that. I’m a firm believer in using what works, not what’s trending. My gear picks are minimal, intentional, and rooted in one guiding principle: don’t upgrade until your current setup is actually holding you back.

Someone once told me not to buy a new camera or lens until I wanted to create something my current gear literally couldn’t do, and honestly, that advice has saved me thousands. It’s also helped me get to know my tools inside and out, which means I spend more time creating and less time chasing upgrades.

So everything on this list? It earns its spot. Whether it’s a styling tool, camera, or something I toss in my carry-on, it’s here because it’s simple, it works, and it serves a very specific purpose in my creative workflow.

Bookmark this page and check back—I’ll keep it updated as my gear evolves. Or scroll down to get the free PDF download.

(Note: The majority of these are Amazon affiliate links connecting to the various brand shops. Feel free to search out your own sources for each. But thanks for your support if you purchase something through a link.)

Styling Tools

8x8-Inch Mat Boards
The most essential tool in my studio is a small foam core board or mat board to bounce light on a small subject like food. I used a small whiteboard for years, but then I found these! One side is white and one is black. So versatile on set!

Spring Clamps
A must-have for folding up my mats and foam core boards. The 2-inch are great for the small mats above. I use 6-inch for larger boards. Note - The orange can reflect, so opt for black, but you can always just drape a linen over the handle to cover it.

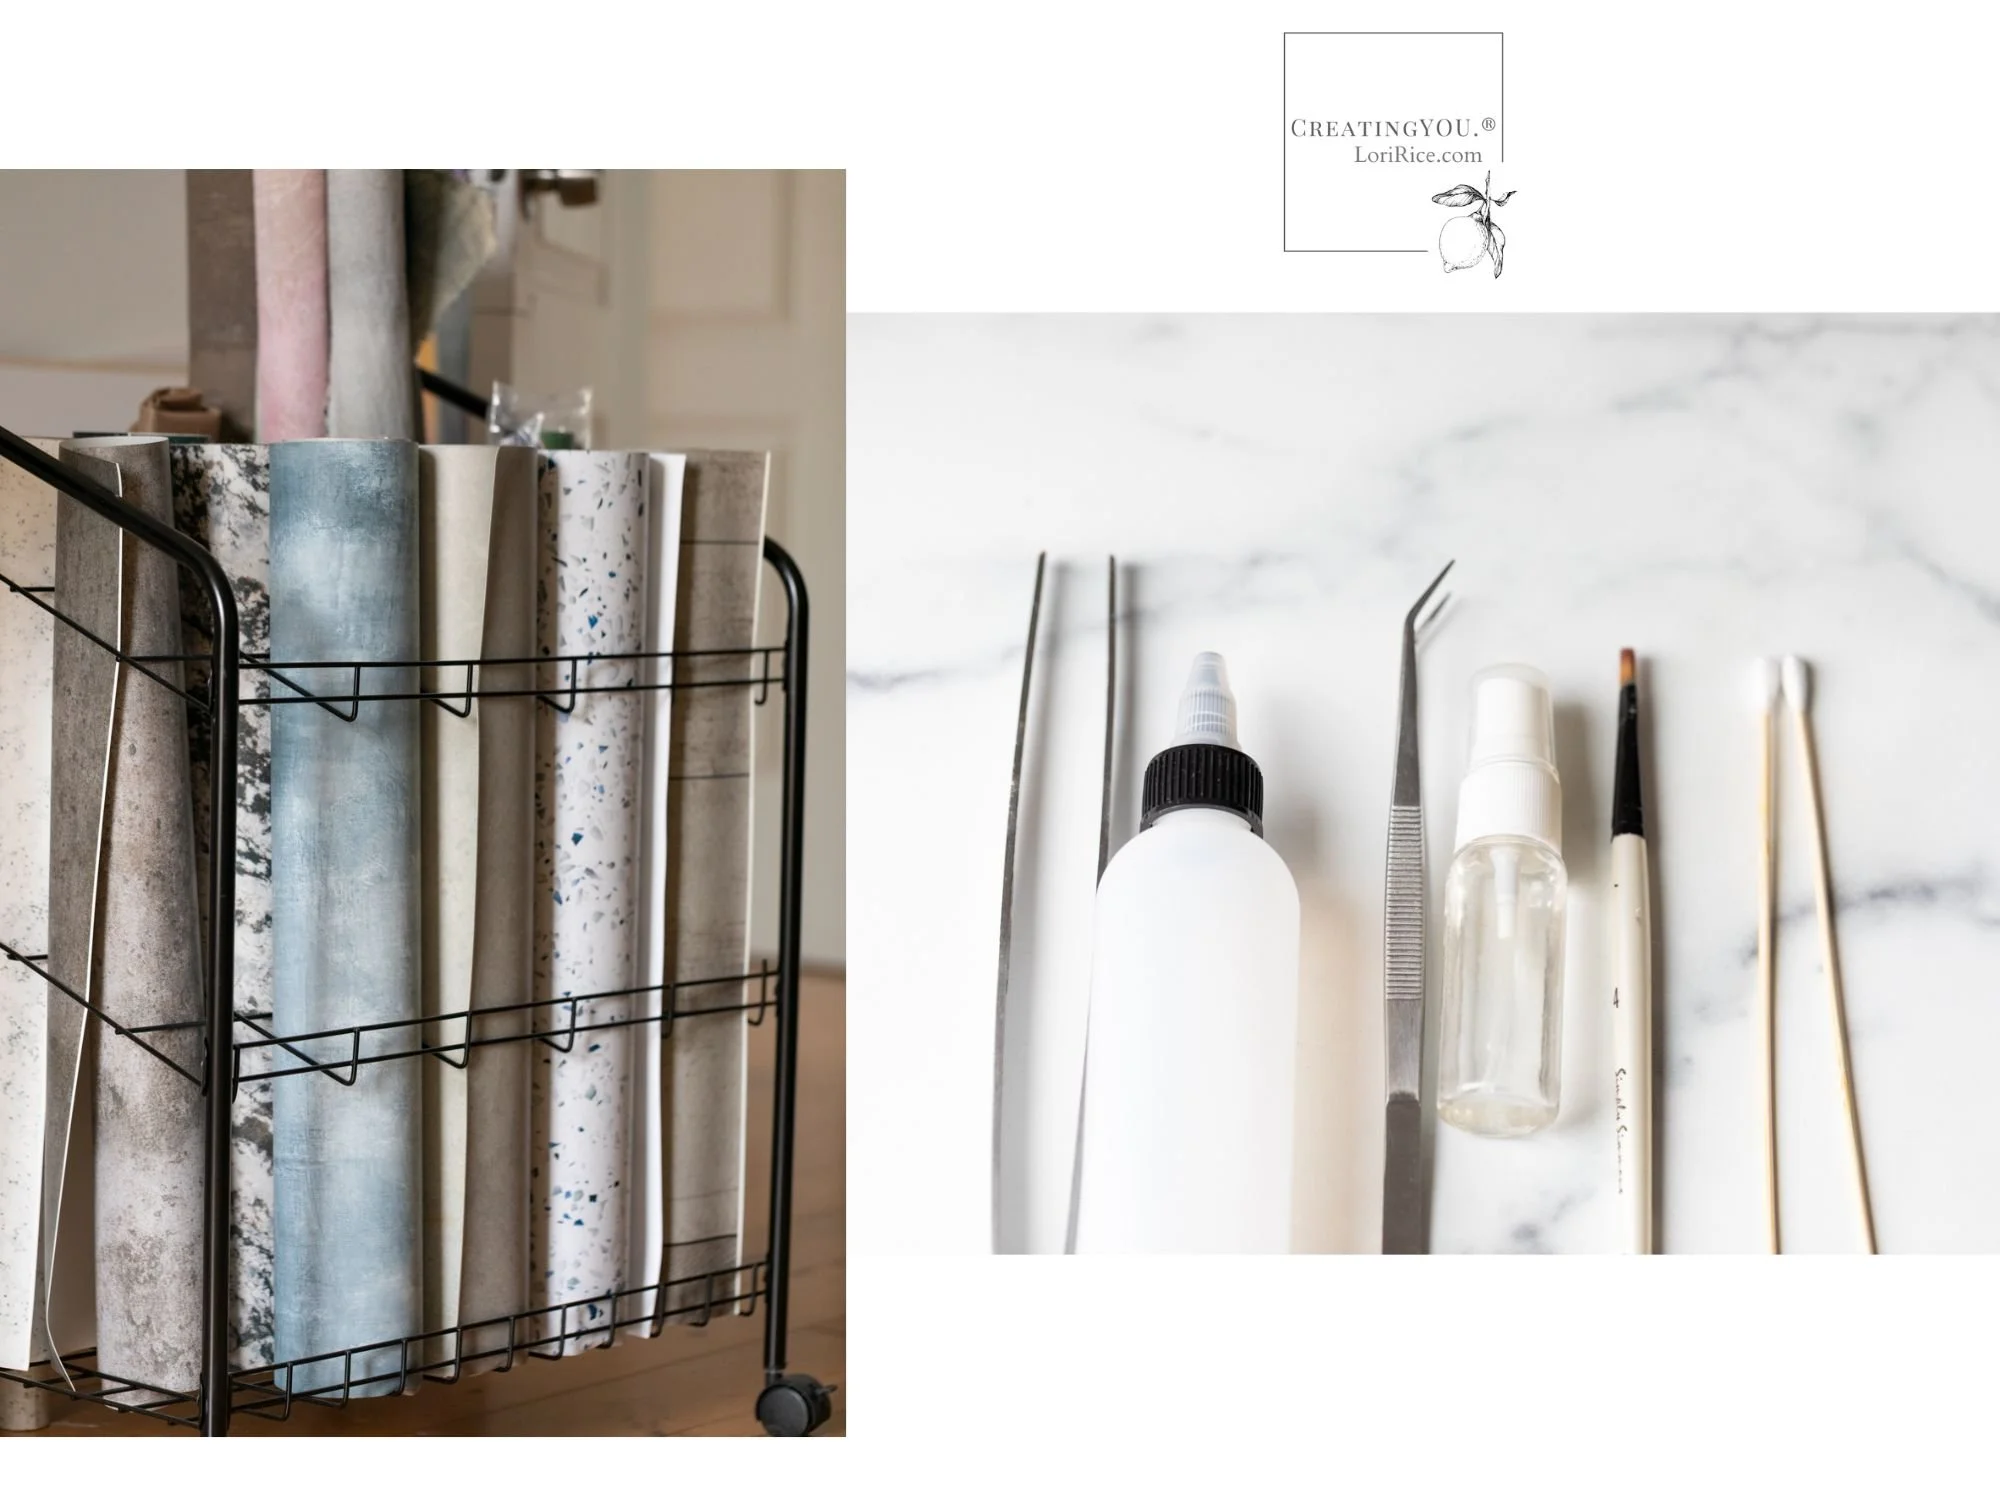
Rolling Cart to Hold Vinyl Surfaces
I love this cart. It holds all my vinyl surfaces as well as my rolled painted canvas and contact papers. The best part is it’s light and moves so I can easily roll it out of the way or closer to set.

Spray Bottles for Water, Oil and Glycerin
These small bottles help me to control the spritzes on set and pack away easily.

Museum Sticky Putty
I can’t live without this stuff. It holds utensils in place, keeps a blueberry from rolling off set, holds down the corner of a surface, or secures it to the wall.

Condiment Bottles
I’ve used bottles like this to apply condiments for years, but I recently purchased these for a workshop I was teaching. They are perfect and now my go-to for ketchup, salad dressing, chocolate sauce - you name it. 

Gaffer Tape
Another must-have to secure vinyl surfaces to my wall as backdrops.

Cotton Swabs
For quickly cleaning up a drip of dressing or the side of a soup bowl. Standard bathroom cotton swabs work, too, but I like the long sticks on these if I need to reach into a plate or bowl without disturbing anything with my fingers. 

Diffuser
The diffuser/scrim I use most often when I need one. I also recently found this small diffuser that is perfect if you hike to sets outdoors. I also have one similar to this extra large diffuser that will cover a whole window or doorway. 

Curved Serrated Tip Tweezers
Six to seven inches is the length I like for moving around little bits from beans to basil leaves and salt flakes.

Long Kitchen Tweezers
For styling pasta.

Paint Brushes
Several sizes for applying oil or water to produce, breads, and meat.

Dulling Spray
Love this stuff for shiny spoons and spatulas. It will dull the surface so you don’t see your own reflection in the shot. 

Styling Kit Bag
Just a simple travel toiletry bag that I find has space to hold everything I need and plenty of compartments. 

Rolling Chef’s Cart
If you move around your space a lot, I have loved having one of these. I can prep on the top surface and have all my styling supplies below. It rolls right up to the board/surface I’m shooting on.

Baker’s Rack
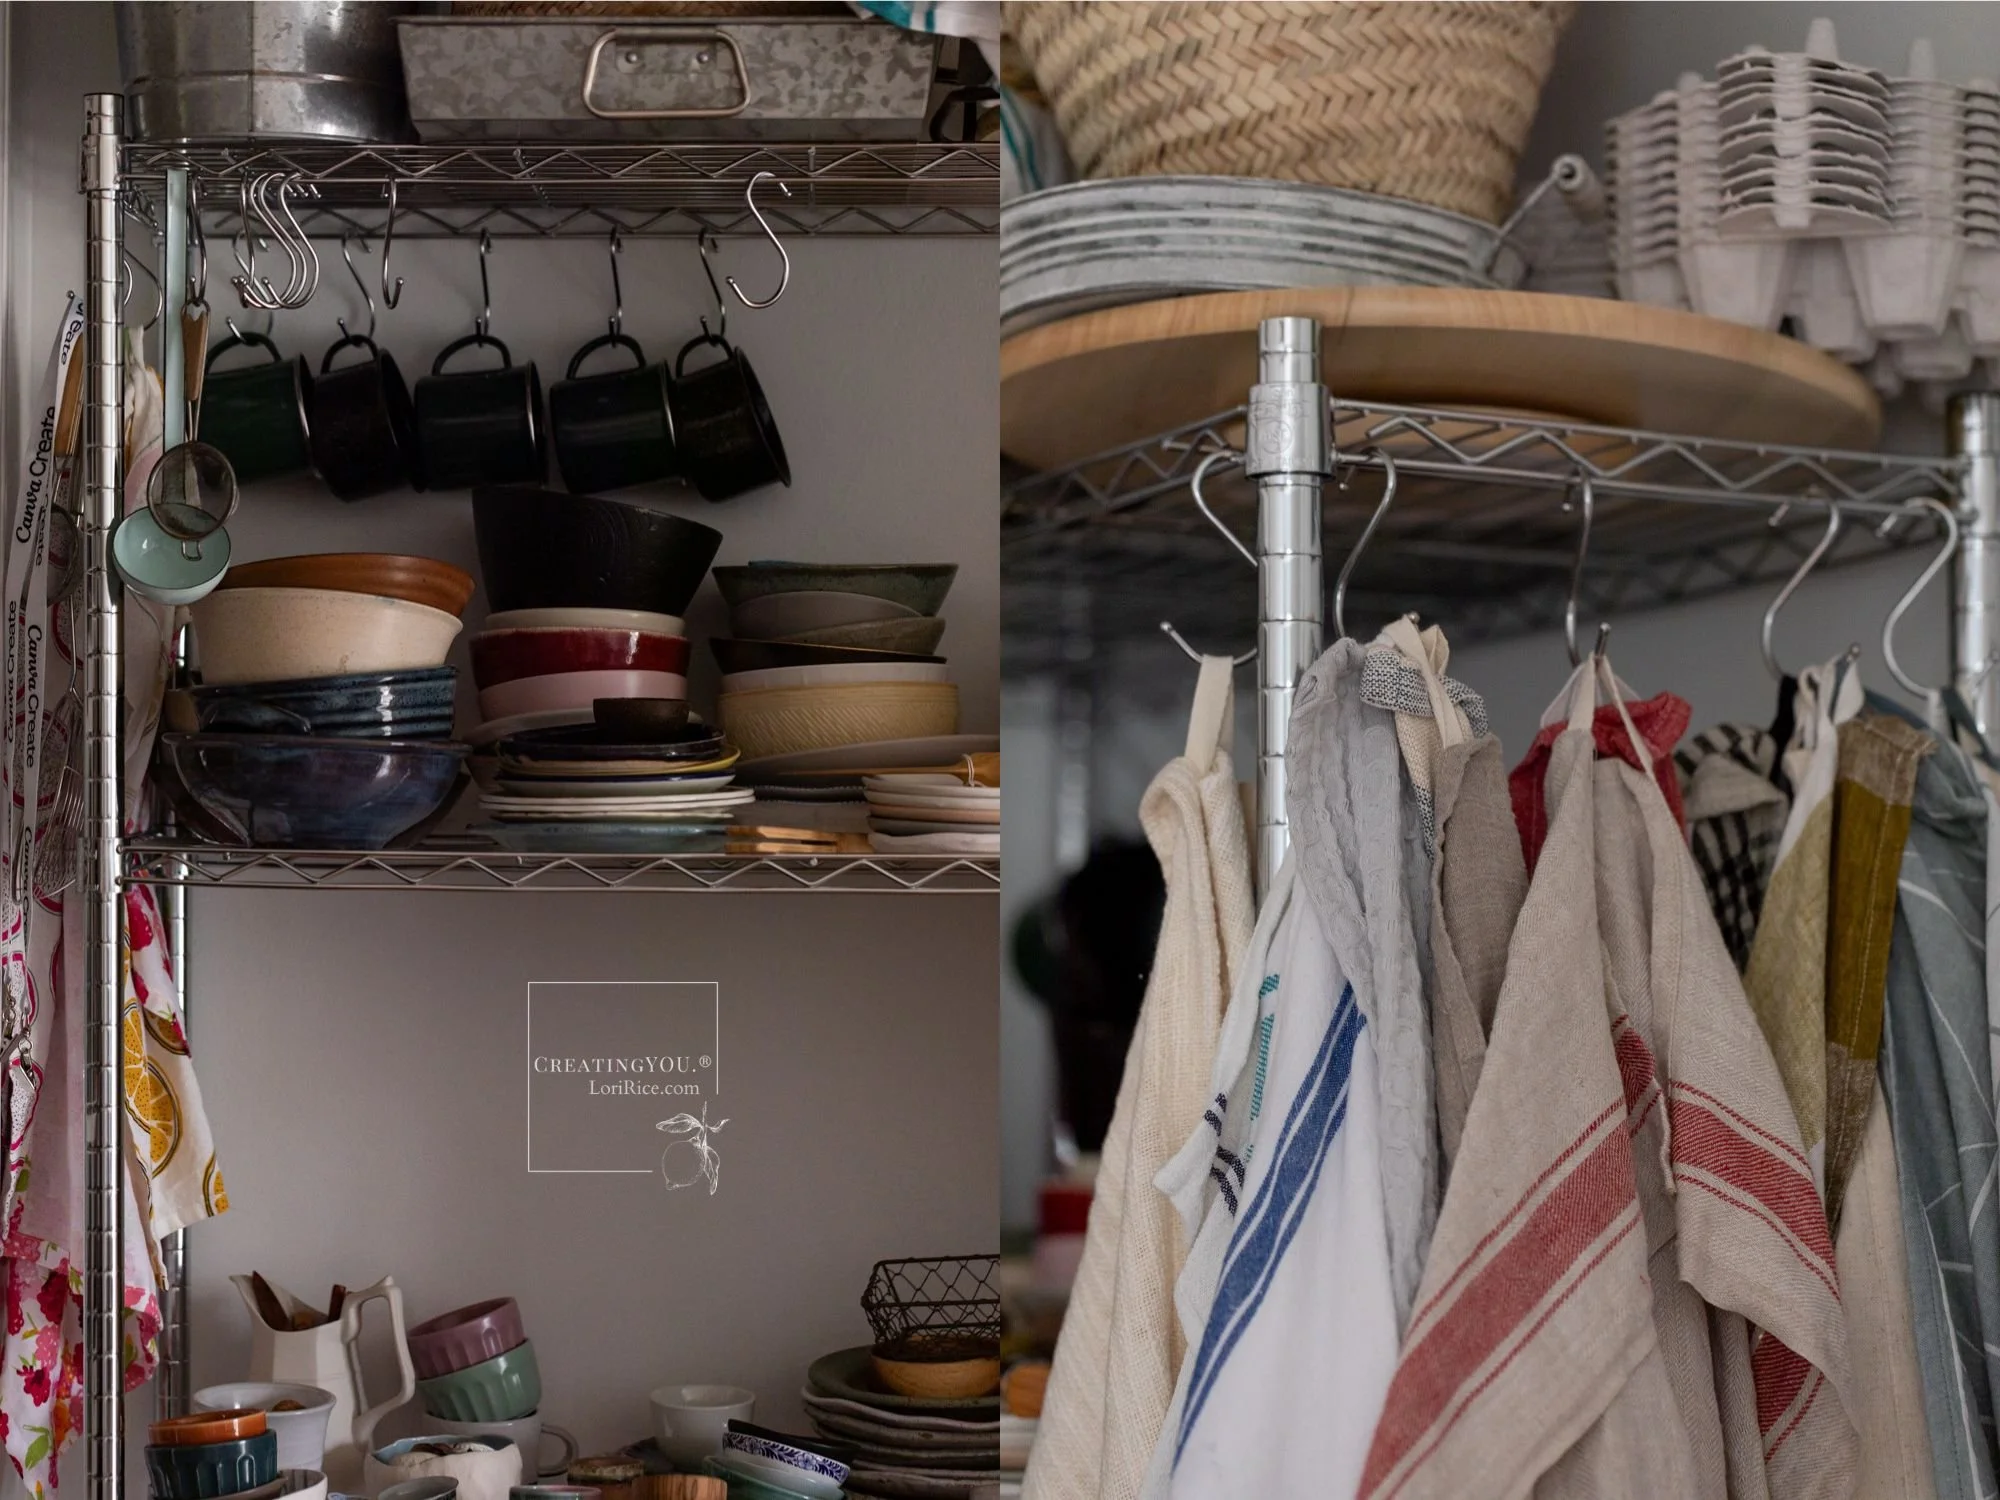
Choose the size based on your space. I have used lots of different shelving to store my props and a simple baker’s rack has always been my favorite solution. 

Food styling baking rack and linens

S-Hooks
Another reason I like baker’s racks is the ability to use these hooks to hang other props such as linens or utensils off the side.

3-Step Ladder
This is the style of ladder I use for overhead shots and to get a higher angle over my subject. I find the 3rd step essential to get me tall enough.


Travel and Remote Work Essentials


Single Camera Bag
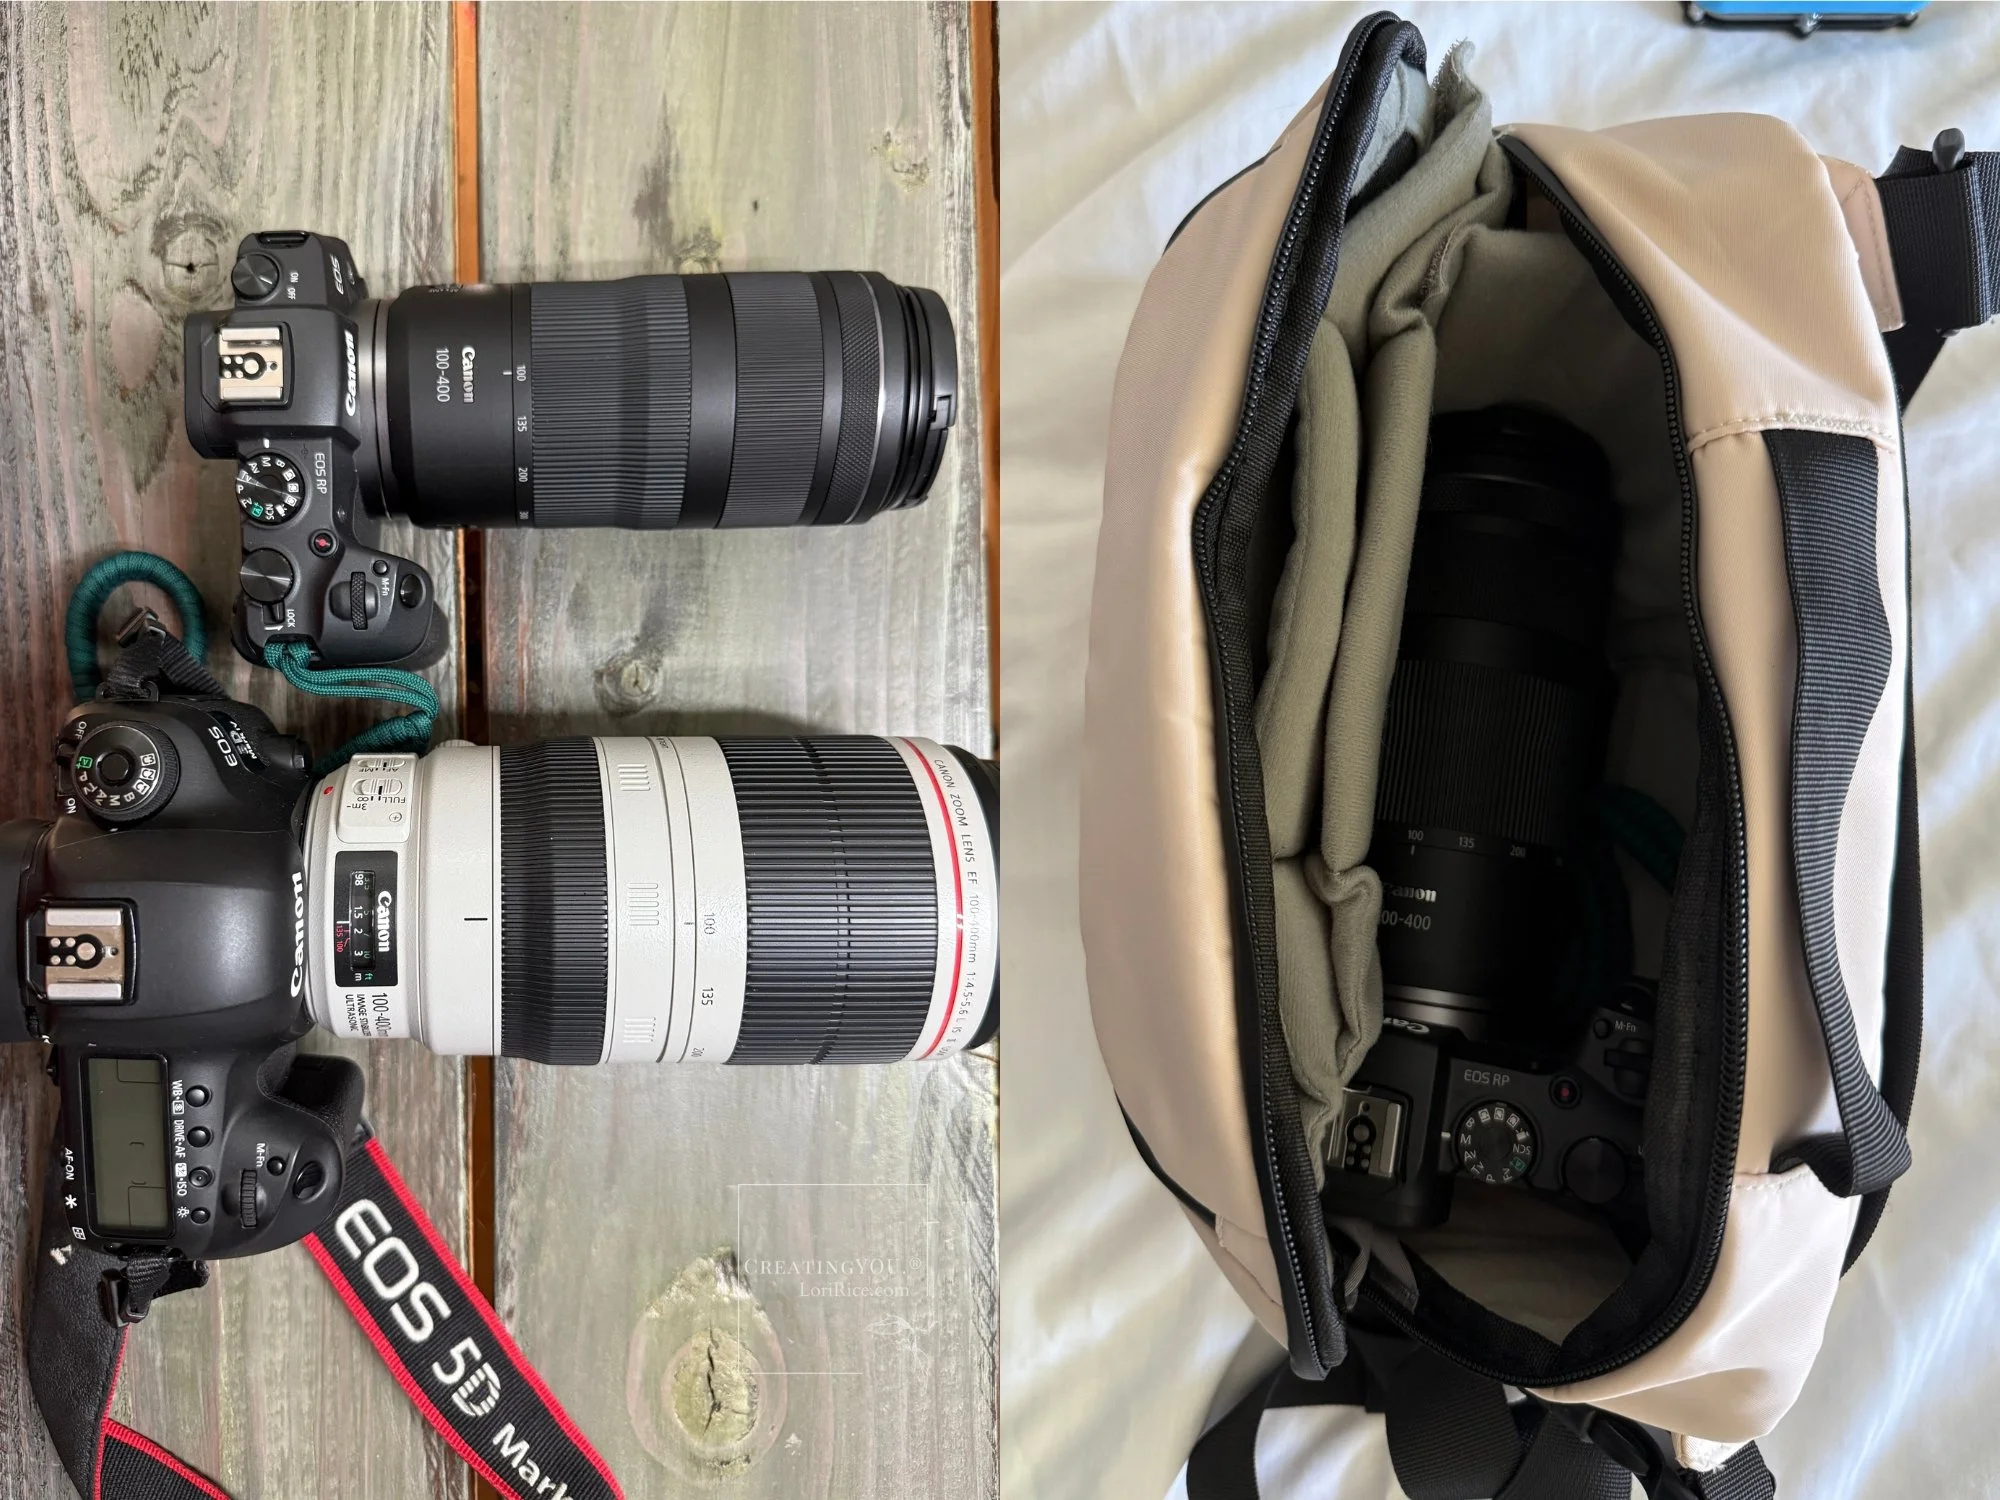
I have tried so many different bags for travel when I take only one camera without much luck. I got this waterproof bag before our trip to the Big Island, and it has been perfect! It’s ideal for one camera and a lens with an extra battery and camera card, with space for my phone and wallet. I use it for my Canon Mirrorless EOS RP with my 100-400mm lens when traveling.

DSLR Backpack
It also took me forever to find the right backpack to carry all of my gear when I need it. I’ve had this for a few years now, often carrying it back and forth every day when I work on-site and when I had a studio outside my home. I’m so pleased with how it has help up because I weight it down! It will hold my Canon 5D Mark IV, my 100-400mm, 24-105mm, 100mm macro, and 50mm. Plenty of space batteries and camera cards. And a spot for my laptop (now a 13-inch Macbook) and my iPad Pro. 

Samsung T7 Portable SSD
I run Lightroom Classic on my laptop, but I don’t want the photo storage to slow it down. I got this a while back to support the raw file storage. It’s slim and fast. 

SanDisk 1 TB Extreme Portable SSD
I use this to back up remote shoots when I’m on the road as an extra measure of security in case I’d lose a card or have one fail. I copy all photos from my camera’s SD card to this drive through my laptop. Once those images are edited and safely in my storage archives, I delete them from this drive. I used this a lot when I was on the road photographing the California Farm Table Cookbook. 

Underwater iPhone Housing
A great option if you travel or work near water. I’ve filmed swimming pigs in the Bahamas and sea turtles in Hawaii. 

Zip Bags
Creating small compartments to hold things either in my laptop bag or while traveling is essential for me. I use these bags everywhere I go. With all the different sizes they hold camera cards and batteries, separate my notebooks and journals from the rest of my bag, and I use them for one change of clothes in my backpack when I need it. It makes things really easy to find quickly and separate from the millions of other things I always seem to be carrying.


Camera Gear

Canon 5D Mark IV
I know the world is moving to mirrorless, but I will never stop loving this camera. I use it for all my double exposure and when I first got it several years ago, it changed my photography forever.

Canon EF 24-105mm f/4L IS USM Zoom Lens
The lens I have used most in my work by FAR. I love it for food and table scenes. 

Canon EF 100mm f/2.8L IS USM Macro Lens
I have to admit, I got this lens because another food photographer raved about it. Then I didn’t use it for food at all for a very long time. Now that I photograph more in my garden, I love it. And I use it for all my double exposure floral photography. While I use it a lot more these days, I still rarely use it on set for food.

Canon EF 50mm f/1.4 USM Lens
Like many people, this was my first food lens. It worked great for me until I transitioned the 24-105. These days I use it most often for overhead flatlays. I used it for travel with my DSLR before I got my mirrorless. 

Canon EF 100-400mm f/4.5-5.6L is II USM Lens
What I use for my wildlife shots. It’s definitely a great one to start with. Heavy and I’ve transitioned to mirrorless for travel, but I still use this every week. 


Canon EOS RP Full Frame Mirrorless Camera
My DSLR is still working great for me, so I’ve only tiptoed into mirrorless. It took me a while to decide, but I had to return to my main goal - to have something lighter and smaller for travel. While this is considered entry-level, it has been excellent for me. I’m thrilled with my choice to get it.


Camera Wrist Strap
I opted for a wrist strap instead of a neck strap for my mirrorless and I love it. The camera and lenses is so light, this is the best way to carry it in hikes and walks through cities.


Canon RF50mm F1.8 STM Lens
I didn’t like the results from using the adapter to connect my DSLR lenses to my mirrorless (a common complaint), so I got this 50. It makes things compact and a great setup for travel.

Oaxaca Background and Textures Pack available for licensing at Creative Market.


Canon RF100-400mm F5.6-8 is USM
I found myself wanting a wildlife lens that I could travel (really, fly) with and hike with that wouldn’t be heavy. I decided to give this 100-400mm for my mirrorless a try. I am loving it so far. It’s not quite as powerful as my DSLR set up (fps are fewer on the mirrorless), but it has been capturing birds, sea turtles, and deer really well. And it is SO light. I carry it with the wrist strap in one hand with no problem.

Both photos available for licensing on The Luupe.

Camera Remote Control Wireless Shutter for Canon
It took me a long time to find a wireless remote that I really liked. This is it. It’s compatible with my DSLR and my mirrorless. It’s been great for continuous shots that I turn into stop motion and stills.


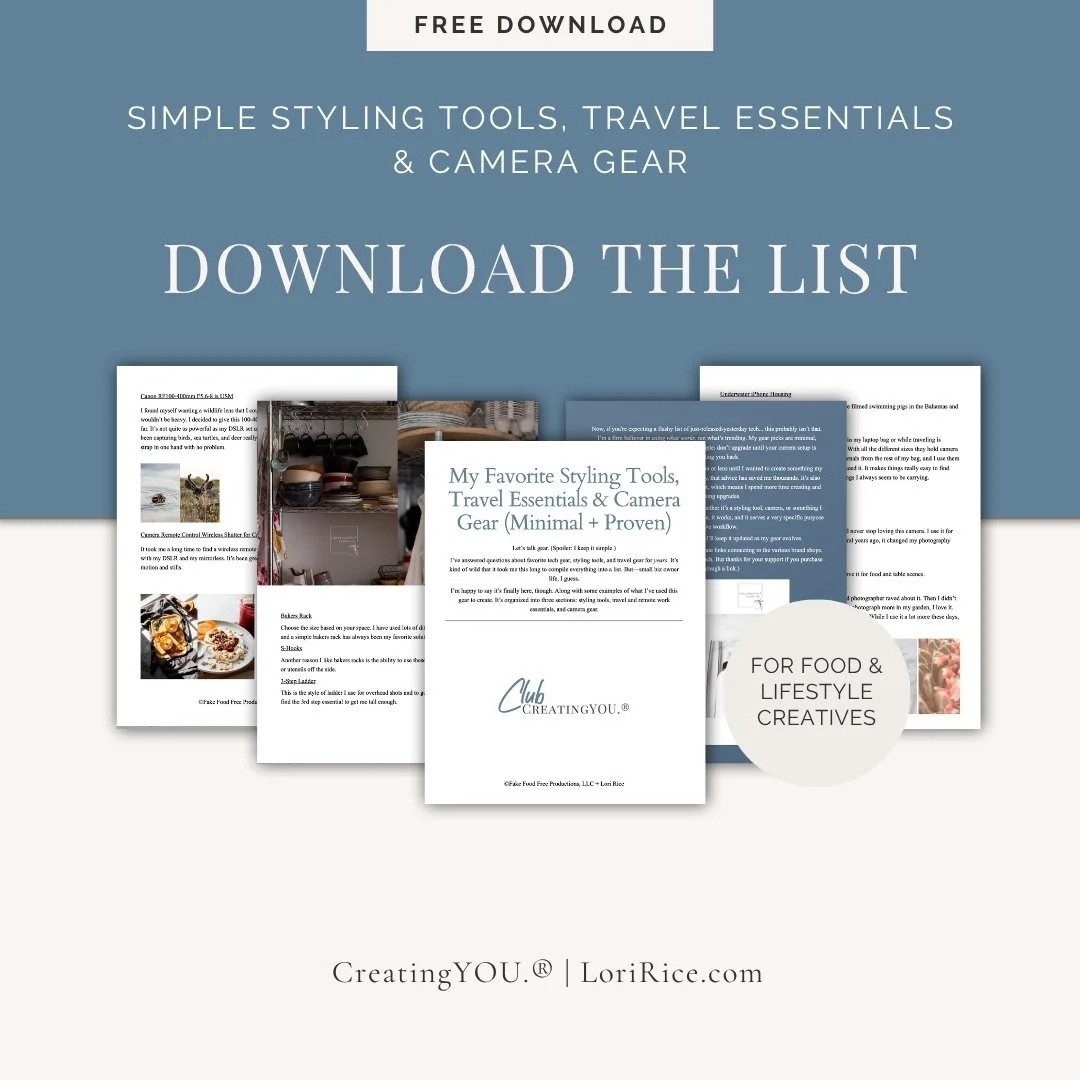
Grab this list in a free download.


tags: photography, styling
categories: Cameras and Tech, Photography Tips, Styling Tips
Thursday 07.24.25
Posted by Lori Rice
 

Flat Lay Photography: A guide to styling from minimal to cluttercore

Some say flat lays are over, but here’s the truth: flat lay photography hasn’t gone anywhere—it’s just evolved. And when done well, it still communicates a message to the viewer in an inspiring, informative way.

A flat lay gives you the opportunity to tell a story in one single frame. They are great for product highlights, ingredients, tools, seasonal themes, color stories, and styled kits.

They are highly shareable whether on social media, on your website or portfolio, and in e-commerce stores. They are still used in everything from print layouts and ebooks, digital products, and branding imagery. They make what you are trying to communicate or sell easy to understand. 

Just this spring, I photographed an advertorial for EdibleSLO that ran in their spring issue to share about local products for Easter baskets and spring gifts.

Flat lays are applicable to nearly everyone. Here are some ways they work for photog-stylists, small business owners, bloggers, and content creators.

  • Food & Ingredients – shopping lists, recipe breakdowns.

  • Products & Packaging – skincare, jewelry, paper goods, you name it.

  • Travel and Shopping Stories – maps, postcards, tickets, journals. Souvenirs you picked up, thrifting shopping finds.

  • Creative Lifestyle – art tools, outfits, accessories, moodboards.

  • Small Biz Scenes – flat lays of your process, materials, or kits.

  • Education - all the varieties that exist (my favorite when it comes to produce, of course!).

These are a few tips to keep in mind when you are styling your shot.

Plan your color palette and choose a direction with color. Go monotone or use complementary color families to create a cohesive look.

Layer by choosing your hero item. Then build from your background to the focal point, your hero. (But you don’t always have to layer. For some flat lays, the hero on the surface works the best.)

Consider the eye path. You are in control of where you want your viewers to look first and where you want their eyes to go. Build that with your composition.

Don’t be afraid of negative space even in busy scenes that embrace cluttercore.

Natural light is your best friend. Use a scrim and white bounce card if necessary to reduce harsh shadows.

Flat lays can range from minimal to maximal in style. It’s your choice and it may vary by your shoot, the client and product, even your mood or the season. Here are some styles to experiment with. 

Minimal = One or two objects. Lots of space. Feels calm and clean.
Classic = A central focus item + a few accent props.
Story + Education Driven = A curated collection of items that tell a moment in time or educate on a topic.
Cluttercore = a current styling trend that is maximal, visually rich, and busy but balanced. An overflowing harvest table or a plant lover's shelf are good examples.

Experiment with different styles to find which you like best and which works the best with the hero you are photographing.

tags: flat lay, styling, food photography, product photography
categories: Photography Tips, Styling Tips
Tuesday 04.22.25
Posted by Lori Rice
 

Styling a Spring Brunch Photoshoot

One scene I wanted to photograph for my most recent book, The California Farm Table Cookbook, was a spring brunch. In addition to the book highlighting food producers, I included a small flower producer, Laurie, who is now a friend. This brunch allowed me to show off her beautiful floral arrangements in the book. 

Laurie invited me to her backyard where she grows her flowers for her arrangements. Here, we set up a spring brunch scene. She put together some arrangements for the table. I prepared the foods from the book and drove the 2 ½ hours to her home in California’s Central Valley bringing along props, linens, and my gear. 

First, we have the flowers. While the food was important, this was the part of the book where I was highlighting Laurie and her work so they needed a prominent place in the photo. 

In our planning call, I shared that I liked long stem, earthy, wabi-sabi style arrangements and we selected her vintage vases together through texting photos. 

Laurie loves a peach color palette so I told her to create what she loved. I planned to keep plates white or light and linens neutral so I knew I could make whatever I needed to work with the color palette she chose. These were the flowers for the shoot:

I brought a table and surfaces, but she had this vintage desk that she often photographed her flowers on. We moved that to the yard and things began to take shape. 

The foods I wanted to include from the book were: 

Sliced Chicken Salad in Curry Dressing
Garden Deviled Eggs 
Candied Walnut, Citrus, and Fennel Salad
Lemon Pistachio Scones

I had to travel the distance to the shoot so I selected only cold picnic foods that I knew would hold up both through the travel and the styling time. I made them all the night before the shoot and garnished on set. 


Side note and a tangent: My original plan was to include my Deep-Dish Artichoke Bacon Quiche in the brunch shoot. It was my number one pick. It turned out that the day I was supposed to prep all the food, my husband hurt his back and I spent all day in the emergency room. I came back to my kitchen in the evening and stayed up most of the night prepping the food to leave early the next morning. My point? It’s important to be flexible when doing this kind of work for yourself. Always have a plan B. It turns out the photo worked just fine without the quiche. 


I brought a few garnishes like chives and cilantro with me, but Laurie had some gorgeous edible flowers blooming at the time of the shoot. We used these to garnish the deviled eggs along with the chives I had and added some cilantro flowers to the chicken salad.

I thought ahead of time what serving bowls would work well with the food and brought a few extras to choose from in case I thought otherwise on set. Once we had that table, I knew the table runner I brought wasn’t needed. With the table and flowers, everything else needed to be simple:

A mug to hold utensils.
A stack of linen napkins.
A stack of different-sized serving plates.
Some serving utensils. 


Note:  I have one full set of plates that I purchased from a ceramicist several years ago. It includes four each of large, medium, and small plates. While I don’t buy multiples of a lot of things, investing in and having this large set has been really great for scenes just like this where a coordinating stack of plates is the best option. 


I also had to make sure that whatever angle I chose only got the green grass and not all dirt of the garden. Of course, this could be filled in during editing, but it was easier to do my best to capture only the grass in the frame. 

I started with a setup for an overhead shot. We moved the table a few times as I worked so that we could get some soft, dappled light through the trees.

I like the photo and I did submit it for consideration by the art team, but it didn’t highlight the flowers enough for me. I didn’t know how I’d feel at the time of the shoot, so I took many angles. This shoot was only going to happen once and I wanted multiple options to choose from. 

An angled shot was much better at showing off the flowers. I submitted this one, too, but had to admit that the chicken salad was not my favorite dish on the table. 

The photo that was finally selected was this one with the eggs as the hero. I felt they were much more attractive than the chicken salad and worked better with the flowers. While all the arrangements are not in the frame, the ones that made it in frame are striking. The touch of floral landscape in the background works well, too. 


Another note: Each of these recipes is in the book with their own photo. I allowed enough time to photograph three of them the same day as this shoot because I wanted the backgrounds and props to coordinate in the book between the recipe chapters and the final menu chapter where this brunch photo is featured. 


This is how it came together in the book:


Questions? I’m happy to answer them. 

tags: food photography, food styling, cookbooks
categories: Styling Tips, Photography Tips
Tuesday 02.25.25
Posted by Lori Rice
 

9 No-Cost Ways to Improve Your Styling and Photography This Month

Improving your styling and photography isn’t always about the technical - the tools, the gear, the settings. Once you know the basics, it becomes more about your ability to:  1) apply your own perspective to the scene you capture, 2) study in a way that gives you new ideas, 3) review your work in a way that allows you to grow, and 4) let go of past beliefs that were taught to you along the way. 

Here are some easy things you can do to build your skill and style. All but one is completely free. 

Print your work:  Take your eyes away from a screen and view your work in print. What do you notice with it in hand that you didn’t on the screen? Do you love it? If not, what would you change? You can print with a printer at home* or send off for 4-by-6-inch prints with an online service for as little as 30 cents each. 

Choose your perspective:  What type of photo excites you the most when you see it? A filled-frame flatlay? A minimal shot with lots of negative space? A scene that tells a full story? A tight macro shot? If it’s all of the above, choose the one you are most excited about at this very moment. Put blinders on and create only work like that for a while. See where it takes you. 


Identify what only you have access to:  Each of us has something we bring to our photos that is unique to us. Start by looking around you, at your environment. I have window grids that bring in beautiful afternoon light, but I have no comforting snowy scenes or intriguing city streets in view from my windows. We often focus on what we don’t have that prevents us from creating a photo we like by someone else. Focus on what you do have to create a photo unlike any other. 


Get rid of old props you don’t use: They clutter your space and sometimes cause you to feel guilty that you purchased them but don’t use them. Donate the items and move on. Sit with some extra space for a while or save up and buy new pieces that truly fit your style right now. 


Study in analog instead of digital:  Have you always taken online courses or watched YouTube videos to build your skills? Grab a photography book and start learning. You may find that something clicks for you learning in that format that didn’t happen with other methods of study. 


Review in analog instead of digital:  If you always study other photos on Instagram or Pinterest, turn off the screen and grab a book. Head to the library, flip through cookbooks, floral design books, interior design books, and travel books with photos. There is so much content out there. And if you worry that the books are old and not on trend, just wait. Like fashion, photo styles will circle back. They always do. 


Go to the portfolio:  If studying the work of others inspires you, leave the social media profiles. Go to an artist’s portfolio website. Most have so much more work that is more beautifully displayed than what is allowed in a tiny grid. Detail, light, props, and angles - these are more visible on a website portfolio. Explore the artist’s categories of work -  their personal, editorial, and commercial work. It will open the narrow view you may have of them and show that you can create more than one thing. 


Choose one other art form that complements your photography work:  Let something else fuel your creativity aside from photographs. Grow herbs or succulents to use in your photos, learn how to naturally dye linens, paint or draw, macrame, crochet, try paper quilling, or junk journal. These things give your brain a creative break while building your eye for textures and colors that you can bring back to your styling. You might also end up with a unique prop to use in your photos. 


Let go of someone else’s style and settings:  Did you learn from someone that you should always do it one way? An ISO setting, an aperture setting, a styling technique? Have you ever tried changing it? There are certainly correct and incorrect ways to operate a camera, but photography is art. There are often many ways to do one thing. See if you can push the limits to those only this way beliefs that were pushed on you. 


Choosing just one of these to test out for a few weeks will change things. And I’d love to know how, so swing back to let me know. Until then, any other things you’ve done that have helped you improve your styling and photography?


Discover ways to earn as a multi-passionate food and lifestyle creative - download More Than One Way free today.


*I use HP printers and love their Instant Ink Membership where I pay a low monthly price based on the number of pages printed and they ship me ink whenever I run out at no additional cost. That’s my referral link so if you decide to try it, we both get a month free. 

I also use Red River Paper for all my printing. My favorite is the Polar Matte photo printing paper. (I’m an affiliate so I earn a small amount from sales through my links.) 


tags: photography style, low cost, styling skills, photography skills
categories: Photography Tips, Styling Tips
Tuesday 02.04.25
Posted by Lori Rice
 

Six Books That Changed My Styling and Photography

Few books on my shelf fail to inspire me, but as I look back on my style and the path of my work, I can see the impact some very specific books have had on the photos I create. There is no doubt that these books made me a better stylist and photographer.

I find it’s important to look everywhere for inspiration, especially outside of where we most expect to find it. These books are not how-to guides for photography and only about half are even related to food photography. Seeing them, reading them, and understanding their perspective provides me with something that I bring back to my work day after day. 

Those things slowly evolved into my eye and my photos. This is truly what it takes to create your own art. Maybe they will inspire you as well, or at the very least inspire you to go searching for your own list.

(Some books in the list are links back to my Bookshop.org shop where a purchase will support independent bookstores and earn me a very small affiliate commission.)

What I Eat: Around the World in 80 Diets by Peter Menzel and Faith D’Aluisio.

This was the first photography book on my shelf and my first introduction to documentary photography. It remains the most impactful 15 years later. My background in nutrition is what launched my interest in food and food culture. That interest is what motivates my work in food styling and photography with an emphasis in where food comes from. This book still encourages me to capture a different perspective. On the dietary and nutrition side of things, while I didn’t know it then, it laid the foundation for my belief that there is no one right way to eat. 

Home Made by Yvette van Boven with Photography by Oof Verschuren.

All of her cookbooks inspire me, because I have all but one. But this was the first one I added to my collection many years ago. Seeing the photos by Oof Verschuren in this book was striking to me during a time when everything in food photography appeared very much the same. They were truly original and encouraged me to insert my own little differences into my photos. They almost serve as a sign of permission that you can do your own thing.

Bountiful: Recipes inspired by our garden by Todd Porter and Diane Cu.

This book inspired me to start capturing what is outside with what is in. It helped that I took a workshop with Todd and Diane about the time this book was published. The book has also taught me to create my own scenes when what I want to photograph isn’t right there for me to capture. 

Wabi-Sabi Welcome by Julie Porter Adams.

This book met me right where I was when I found it several years ago. I wanted, and still want, simplicity. It educated me on the concept of wabi-sabi and allowed me to incorporate more of that - negative space, natural elements - into my photos. 

In the Mood for Colour by Hans Blomquist.

All of his books are worthy of your shelf, but this one in particular helped me appreciate original color. I’m typically drawn to neutrals and muted tones in my work, but when I flip though this book I’m encouraged to add pops of color where they work. It has also shown me that color can be present without being loud or demanding. It can be rich and intriguing. 

The Multi-Hyphen Life by Emma Gannon.

No, there isn’t a photo in this book, but it did something for me that no other book has. That is to embrace the fact that I do many things. I am a stylist-photographer-writer. I consult, direct, style props, develop recipes, create photos, capture photos, and write words that go with it all. After years of feeling like this made me less than because I wasn’t focused on one thing or served one narrow role as part of a photography team, I finally embrace it and know it makes me so much better at my work. I don’t have to do it all, but can, and often do, do it all. 

If you are on a search for more books to add to your reading list, always feel free to check out my page on Bookshop.org where I keep updated lists of all my favorites. 

CreatingYOU.® - Get more helpful content just like this
tags: photography, styling
categories: Photography Style, Photography Tips
Friday 01.17.25
Posted by Lori Rice
 
Newer / Older

Our Privacy Policy and Terms of Sale. ©2025 Fake Food Free Productions, LLC.