• HOME
  • Portfolio
  • Club CreatingYOU.®
  • About
  • Cookbooks
  • Blog
  • Search

Lori Rice

Photography | Styling

  • HOME
  • Portfolio
  • Club CreatingYOU.®
  • About
  • Cookbooks
  • Blog
  • Search

9 No-Cost Ways to Improve Your Styling and Photography This Month

Improving your styling and photography isn’t always about the technical - the tools, the gear, the settings. Once you know the basics, it becomes more about your ability to:  1) apply your own perspective to the scene you capture, 2) study in a way that gives you new ideas, 3) review your work in a way that allows you to grow, and 4) let go of past beliefs that were taught to you along the way. 

Here are some easy things you can do to build your skill and style. All but one is completely free. 

Print your work:  Take your eyes away from a screen and view your work in print. What do you notice with it in hand that you didn’t on the screen? Do you love it? If not, what would you change? You can print with a printer at home* or send off for 4-by-6-inch prints with an online service for as little as 30 cents each. 

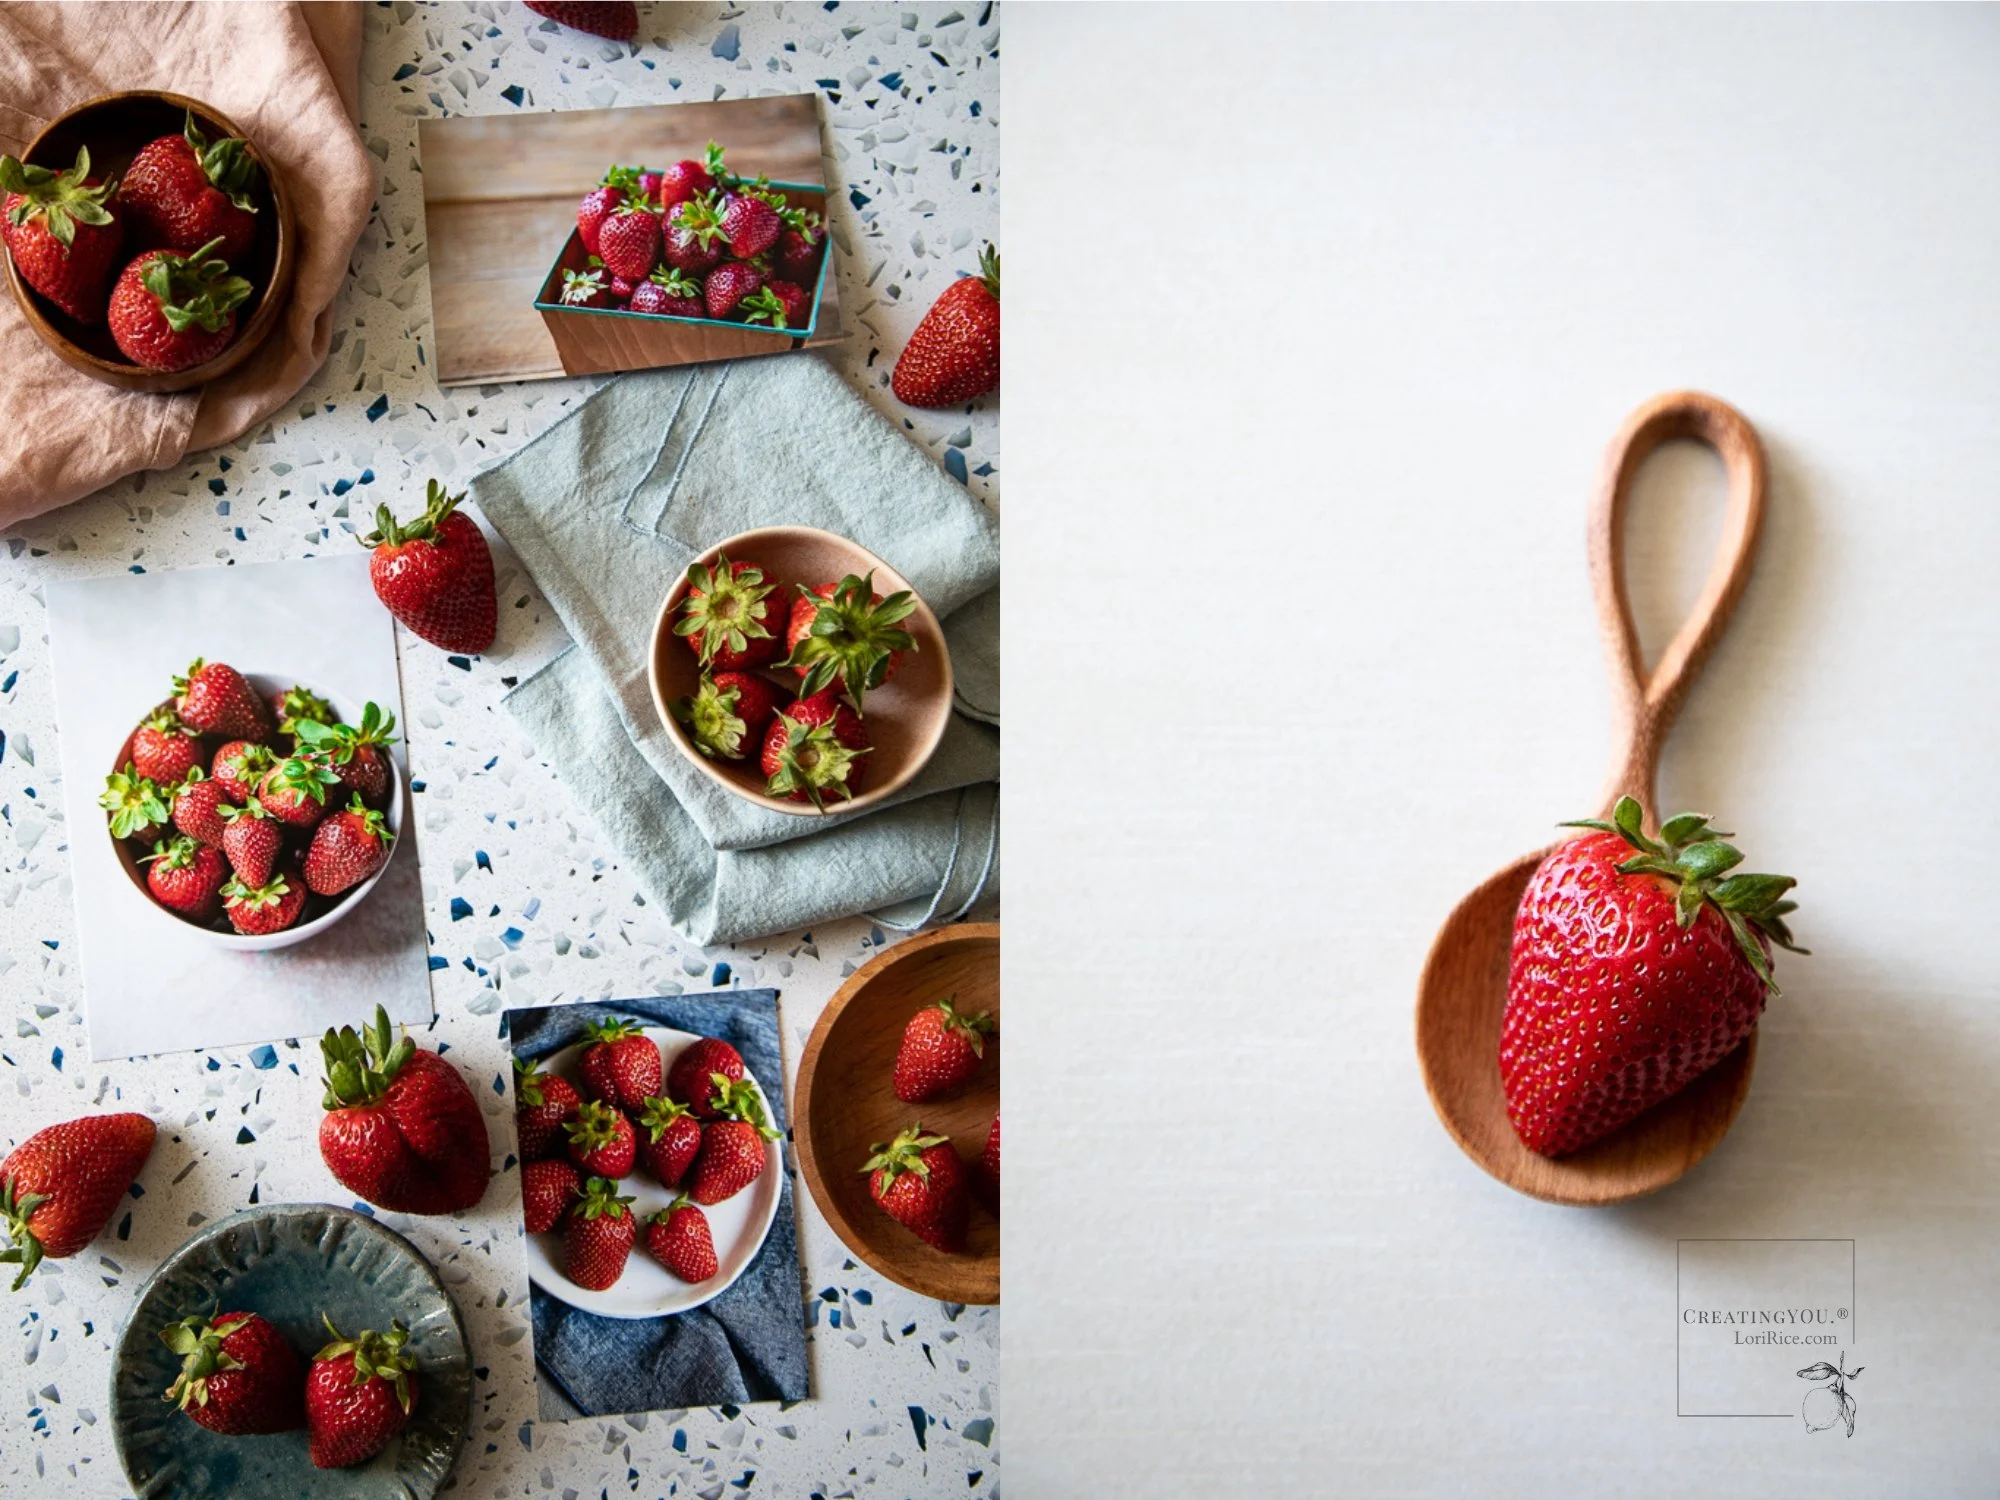
Choose your perspective:  What type of photo excites you the most when you see it? A filled-frame flatlay? A minimal shot with lots of negative space? A scene that tells a full story? A tight macro shot? If it’s all of the above, choose the one you are most excited about at this very moment. Put blinders on and create only work like that for a while. See where it takes you. 


Identify what only you have access to:  Each of us has something we bring to our photos that is unique to us. Start by looking around you, at your environment. I have window grids that bring in beautiful afternoon light, but I have no comforting snowy scenes or intriguing city streets in view from my windows. We often focus on what we don’t have that prevents us from creating a photo we like by someone else. Focus on what you do have to create a photo unlike any other. 


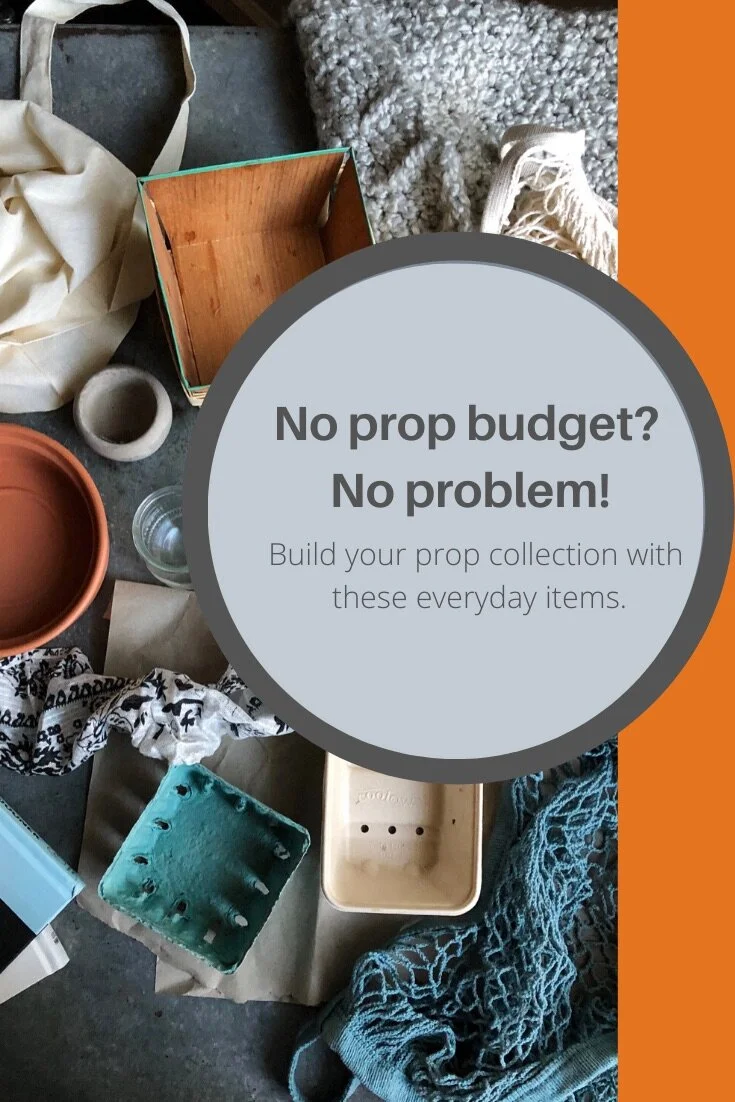
Get rid of old props you don’t use: They clutter your space and sometimes cause you to feel guilty that you purchased them but don’t use them. Donate the items and move on. Sit with some extra space for a while or save up and buy new pieces that truly fit your style right now. 


Study in analog instead of digital:  Have you always taken online courses or watched YouTube videos to build your skills? Grab a photography book and start learning. You may find that something clicks for you learning in that format that didn’t happen with other methods of study. 


Review in analog instead of digital:  If you always study other photos on Instagram or Pinterest, turn off the screen and grab a book. Head to the library, flip through cookbooks, floral design books, interior design books, and travel books with photos. There is so much content out there. And if you worry that the books are old and not on trend, just wait. Like fashion, photo styles will circle back. They always do. 


Go to the portfolio:  If studying the work of others inspires you, leave the social media profiles. Go to an artist’s portfolio website. Most have so much more work that is more beautifully displayed than what is allowed in a tiny grid. Detail, light, props, and angles - these are more visible on a website portfolio. Explore the artist’s categories of work -  their personal, editorial, and commercial work. It will open the narrow view you may have of them and show that you can create more than one thing. 


Choose one other art form that complements your photography work:  Let something else fuel your creativity aside from photographs. Grow herbs or succulents to use in your photos, learn how to naturally dye linens, paint or draw, macrame, crochet, try paper quilling, or junk journal. These things give your brain a creative break while building your eye for textures and colors that you can bring back to your styling. You might also end up with a unique prop to use in your photos. 


Let go of someone else’s style and settings:  Did you learn from someone that you should always do it one way? An ISO setting, an aperture setting, a styling technique? Have you ever tried changing it? There are certainly correct and incorrect ways to operate a camera, but photography is art. There are often many ways to do one thing. See if you can push the limits to those only this way beliefs that were pushed on you. 


Choosing just one of these to test out for a few weeks will change things. And I’d love to know how, so swing back to let me know. Until then, any other things you’ve done that have helped you improve your styling and photography?


*I use HP printers and love their Instant Ink Membership where I pay a low monthly price based on the number of pages printed and they ship me ink whenever I run out at no additional cost. That’s my referral link so if you decide to try it, we both get a month free. 

I also use Red River Paper for all my printing. My favorite is the Polar Matte photo printing paper. (I’m an affiliate so I earn a small amount from sales through my links.) 


Never miss helpful tips just like this. Join others who style and photograph their own food and product photos and sign up for CreatingYOU.® emails from Lori Rice.

Learn more about CreatingYOU.® emails
tags: photography style, low cost, styling skills, photography skills
categories: Photography Tips, Styling Tips
Tuesday 02.04.25
Posted by Lori Rice
 

How to Create a Background for Food Photography

raddichio food photography on a wood surface and created background

Since I’ve been photographing while out and about the past few weeks while traveling, backgrounds have been top of mind for me. A few weeks ago, I wrote about embracing your background to create a sense of place with your photos. Today, I want to bring things back to basics with some ideas for things to use as backgrounds and how to capture them in your set. 

It’s easy to create a background for food photography and there are loads of options including things you may have around the house.

Vinyl surfaces

Let’s start with a more obvious one - vinyl surfaces. Because these are so light, they can easily be taped or tacked to a wall to create your scene. 

In the first photo, my vinyl surface is taped to the wall and the table is pushed up against the wall to meet it. In the second, same for the wall, but I have another vinyl surface on top of the table to create a new look. 

Hanging painted canvas

You can hang a painted canvas behind your set to create a textured wall. I’ve done this by draping it over a scrim or reflector arm holder in the past, but you can also use any kind of bar such as rolling hanging rack and drape it over or secure it with clamps.

The photo on the right is the start of the final photo that was used as the cover for my cookbook, Beer Bread. 

Draped linens

Sometimes you simply need to dress up a plain white or cream wall. A great way to do this is to install a closet hook at the top of your shooting wall. You can then add a standard hanger or create one with a rod and twine to drape a long linen or table runner. 

Propped up boards

I have a habit of propping up anything I can find to create the look I want for a photo. Sometimes this is a little risky because it isn’t quite as secure and could topple onto set, but for the most part, if I work quickly, I propping up boards or leaning solid surfaces against the wall works well. 

In the left photo, long boards are resting on the floor and leaning against the table. In the right photo, I have a vintage wood drying tray sitting on the table and leaning against the wall.

Curtains

I love backlight so it’s pretty natural to let curtains in a window work as my background. This is the same set, shot in two different ways. First, I draped a dark linen tablecloth over the curtain rod. When bright light hits it, it highlights the sheerness of the fabric. In the second, I used a sheer white curtain. 

Cookie sheets

If you have an old cookie sheet with a patina, it can make a dramatic background for a tight shot.

Contact paper

Prints are an acquired taste for food photos, but I love them. Taping or tacking contact paper onto a wall is a fun, affordable way to create the look of wallpaper. I leave the backing on and just tape it up, but you can also remove the backing and stick it to a foam core board to create a more stable background you can prop up. 

I hope this sparked some new ideas for backdrops!


UPDATES

My latest cookbook, The California Farm Table Cookbook, will publish June 18 and I cannot wait! Not only am I excited for it to be out in the world, but I have so many photos in it to teach from. I can’t wait to start sharing them with you. 

As a part of the release, events are being planned with more to come. You can learn more at the Events Calendar here on my website. The first one is in my home county where we’ll be having a launch party at Dresser Winery.

Looking even further ahead, I’ll be in Snohomish, Washington again this September to teach flower photography with Fleurs Creative. More details to come.


Club CreatingYOU.® has been running for several months now and I’d love for you to check it out. I’m keeping the membership at a super affordable rate on Substack with lots of helpful content to build your skills released each month. 

tags: styling, low cost
categories: Styling Tips, Photography Props
Friday 05.10.24
Posted by Lori Rice
 

Free and Low Cost Food Photography Props

Free and Low Cost Food Photography Props

No prop budget? No problem!

No time to read? Click the play button and listen to this post instead!

Perhaps you are just starting out with no money to put towards a prop budget. Or maybe you just need a few photos here and there and spending money on food photography props simply doesn’t make sense. 

Even if you have a prop budget, who doesn’t want to save money and have a few extra items to work with?

I have so many items in my prop collection that I first purchased for an everyday use. By keeping a watchful eye you can shop smart and buy things that will serve a dual purpose. 

This means that you are essentially building your prop collection for free!

Below is a list of times to look for. I use these items all the time to style creative images for myself and for my clients. When you aren’t using them in the day-to-day, grab them for your photo set-up and create some killer food and product images.  


Terra cotta pot bottoms
That plate (or bowl) under a terra cotta pot that catches drained water? Grab it and wipe it down. The smaller, flat versions are great for garnishes. One with a deeper edge (those from IKEA are excellent) can be used as a shallow bowl. 


Yogurt and pudding jars
Finally, we have more options for glass yogurt jars in the States. The next time you need yogurt, opt for a few of these. Wash the jars in the dishwasher. You can use something like Goo Gone if the labels are difficult to remove. They are perfect for sauces and dressings. A similar option are pudding and dessert jars. I’ve been seeing more and more of these at Costco. 


Jam and mustard sample jars
You know the little jars that jams and condiment samples come in? Keep those, clean them up, and put spices or nuts in them for your set. 


Berry baskets
When you buy berries and other produce at the farmers market, ask the vendor if you can keep the basket they are displayed in. Most of the time the answer will be yes.


Reusable bags of all kinds
I’m big on making an effort to reduce plastic so I have all types of bags for produce, carrying groceries, and picking fruits and vegetables. White mesh, canvas, knitted bags - these can all styled into photos.


Amazon packing paper
You know the kind. All that brown paper that comes stuffed in that huge Amazon box with one small item in it. Yeah, that. Keep it. Brown paper can replace plates and platters for cookies and bars, trail mixes, sandwiches, breads and baked goods, and chips or fries. 


Bed and bath storage containers
Many of the items used for the bed and bath as storage solutions can serve as props. I have some small bamboo boxes and I can use the lids or the whole box. Some soap dishes can even work as small plates. 


Chunky sweaters 
Not kidding. I have an Instagram photo coming up soon that uses a chunky sweater my mom made for me to create a cozy coffee scene. 

Books
I know vintage books in photos are a bit of the rage, but you can use new books to create an interesting set, too. Just remove the jacket and you’ll have a clean, crisp, colored or white surface to stack a hot drink or cocktail on for a beautiful shot. 

Scarves
I can’t tell you how many times I’ve used a scarf as a linen in a shot. Lacey, silky and flowy, plaid, flannel, solid, print - they can all work. 


While I know that this won’t give you a complete prop collection, it does provide some no-cost options when you have a limited prop budget, or no budget at all. Keeping these types of things in mind for photography gets the creativity flowing and you’ll start looking at everything in your home or shop in a different light. 


Now go search around the house and see what you can find!

 
I love these tips! Let me know when there are more!


Need some creative inspiration? Grab a copy! A helpful guide with information that can be applied to all types of food and product photography!


10 Ways to Photography Banana Bread
tags: budget, low cost, food props
categories: Photography Props
Friday 11.01.19
Posted by Lori Rice
Comments: 2
 

Our Privacy Policy and Terms of Sale. ©2025 Fake Food Free Productions, LLC.