• HOME
  • Portfolio
  • Club CreatingYOU.®
  • About
  • Cookbooks
  • Blog
  • Search

Lori Rice

Photography | Styling

  • HOME
  • Portfolio
  • Club CreatingYOU.®
  • About
  • Cookbooks
  • Blog
  • Search

An Interview with Me, Professional Photographer Lori Rice

About 3 years into food blogging, I knew that making it a full-time career was a no-go for me.

I just couldn’t make it work.

But it led me to something that I didn’t see coming. A love of food photography and styling. A passion for sharing about food, honoring my health-roots, and reflecting my affection for the culture of travel through images…of the foods we eat.

Once I made the decision to become not a blogger who took pictures, but a food photographer who also had a blog, things fell into place. Over 10 years, I made the slow and steady transition from aspiring to professional.

My friend and colleague, Jason Logsdon, sous vide expert and founder of Amazing Food Made Easy, recently launched Makin’ Bacon. It’s an essential resource for those who want to serve their fans and grow their income food blogging.

He invited me on to talk about my journey and discuss:

  • how I transitioned my business

  • networking as a key for growth

  • photography tips

  • how I figured out where to price myself when I had no idea where to start

Click to listen above. Or head over to the podcast page for Lori Rice Professional Photographer Interview!

I want to be part of the most supportive, positive food photography community online. Keep me updated!
 
Learn a new approach for photographing a single subject in multiple ways. Gab the FREE Guide.jpg
tags: food photography
categories: Business Tips
Wednesday 02.26.20
Posted by Lori Rice
 

Better Understand Your Food Photography Style in 6 Minutes

Better Understand Your Food Photography Style in 6 Minutes.png

“I can help you get anything you want, but first you have to tell me what that is.”

That statement is from Marie Forleo in her book, Everything is Figureoutable. I started reading the book last year and got about halfway through before work and the holidays took command of my free reading time.

I picked it back up last night and within the first few pages, my eyes came across that statement. It’s what she tells people she is coaching and she relates it back to us knowing what we want. Choosing a goal, one goal to start with.

(Before I go on, I feel like I should say that given her reaction among her fans and followers in response to the very important Black Lives Matter movement, I almost rewrote this post. But after some reflection, I still think that quote leads to some food for thought. So I’ve left this post unedited.)

It resonated with me because often what people tell me is that they don’t know what they like about a photo that catches their attention. A driving force in creating images that reflect your brand in a way that saves you time and frustration is knowing your style.

But people tell me they don’t know how to figure out their photography style. They don’t know what it is that they want. They don’t know where to start.

Have 6 minutes to spare? I’ll show you exactly how to start in this video. We’ll break down a couple photos to help you get a better handle on your likes and dislikes so you can move forward.

Confused to Confident: Food & Product Photography Training. Join us for this 8-week, 12-module online training with personalized support every step of the way!

Are you signed up for LoriRice.com updates? I don’t want you to miss it and all the content I have planned this year with the sole purpose of helping you take better photos to support your brand and business!

categories: Styling Tips, Photography Style
Wednesday 01.08.20
Posted by Lori Rice
 

Food Photography Styling Tools to Buy with $10

Four Essential Food Photography Styling Tools for $10.jpg

No time to read? Listen to the audio file of this post above!

A quick post for you today with some super simple tools that I find essential to food photography styling. 

So let’s say you have $10 to spend. These are the exact things I’d buy. They are things that I use to style food and drink photos for nearly every shoot. Often I use all four, but I always use at least one of these tools. 

Where you buy these and the type you buy will determine if you come in at $10, but it will be pretty darn close. 

If I had $10, these are the essential styling tools I would buy…

Curve Tip Tweezers

These are hands-down the best for styling. Place an herb, remove a crumb, and rearrange a lettuce leaf or garnish. The tip is small enough that it won’t disturb your whole plate. 

Tip:  Be careful around soft foods, such as adjusting potatoes or beans in a soup. The sharp end of the tweezers can stab the food and leave a mark that will show up in the photo. 

Estimated cost:  $5


Small Spray Bottle

I use this to spritz on water to get a glisten of freshness without drowning a subject. I spray fresh fruits and vegetables, leafy greens in a salad, and the tops of soups and stews to keep things looking flavorful. The bottle in the picture above came in a multi-pack on Amazon, but a good place to find an inexpensive single option is the travel toiletry section at a drugstore or Target. 

Estimated cost: $1


Q-tips

Every time I need to wipe a splash on a plate or the inside edge of a soup bowl, I fight with paper towels. It seems like I wipe something away and something else gets smeared on. The solution for me are Q-tips. The small size allows more control to wipe away exactly what you want to get rid of. 

Estimated cost: $2 (go for the generic, they work just as well)


Paint Brush

You don’t need anything fancy here. You can buy an inexpensive artist’s brush set, but for something super cheap option, that’s still effective, head to the kid’s art section of the store for a watercolor brush. I use these most often to brush on olive oil to make vegetables and meats glisten. 

Estimated cost: $2


Arranging garnishes, wiping up drops and splashes, and making things shine or glisten - these are all tools I use on a regular basis to accomplish all of these tasks. And they are by far the least expensive tools used in creating food and drink photos!


I want to be part of the most support food photography group online. Keep me updated!

10 Ways to Photography Banana Bread
tags: pottery, food props
categories: Photography Props
Wednesday 12.04.19
Posted by Lori Rice
 

5 Questions to Ask Before Buying a Piece of Pottery for Your Prop Collection

5 Questions to Ask Before Buying a Piece of Pottery for Your Prop Collection.jpg

No time to read? Listen to the audio file of this post above!

Over the years, my prop collection has grown with more and more pieces of handmade pottery. This is pottery I buy from makers at farmers markets and online, and vintage pottery I find when I travel or on websites like Etsy. 

At some point, I know my entire collection will evolve to all handmade pieces because I just love them that much. That is all I’d shoot with if I could. 

I feel that every piece of handmade art is worth the price paid, but when I’m shopping for a piece for my prop collection the process is much different than when I shop for a piece for my home. 

I have to exercise smart shopping and make sure that my investment will give me something that allows me to create many different photos. 

I thought it would be helpful to share the five things I pay attention to when I’m shopping for a piece. Asking myself a few questions has allowed me to collect many pieces that I use over and over again in different ways, in different images. 


Five questions to ask yourself when shopping for a pottery prop…

Can I use this size of prop for most foods I shoot?

You’ve heard me say that smaller is better before and the same applies here. My most used plates are 4 inches, followed by 6 to 8 inches.

If I purchase a large piece, I have a specific plan for it. For example, a 10-inch dinner plate would be used as a platter in my work, and I do often use those to style full salads and side dishes. I photograph a lot of fresh produce, so I can also get a lot of use out of a large bowl. I have fewer of these latter two in my collection, though, because I don’t use them nearly every shoot like I do smaller plates. 

Will this finish work in my photos?

I’ve had advice to not choose glossy finishes for my pottery. I’d say I agree with it about 85% of the time. I’ve created plenty of good shots with glossy finishes, but I do prefer satin or matte finishes. This has as much to do with my style, though, as it does with functionality (no reflection or glare in the image).

Does it have the right imperfections?

Imperfections give a piece character. I welcome and uneven edge or an irregular circle. This often leads me to seconds and sales. This, of course, saves money, but I’m not doing it to cheat a maker out of the money they deserve. It’s just that what other people consider flaws, I often consider greater character and a one-of-a-kind look for my images. I do have some perfect pieces in my collection, but they are far fewer than those that have their own personality. 

Is it a color I will use often in my photos?

I always start with white and cream because I know I will use these over and over again. From there, I extend to neutrals and natural textures of the clay. This includes grays and blues for me. I have a few colorful pieces, but I use them a lot less so I’m less likely to invest in them. 

Along the same lines, prints and patterns definitely work in images, but because they have such a signature look, I know I can’t use them over and over without looking like I’m using the same prop over and over. Before I jump to prints, I’m much more likely to lean towards monotone patterns in the clay. Imprints of flowers and shapes are fun to work with.

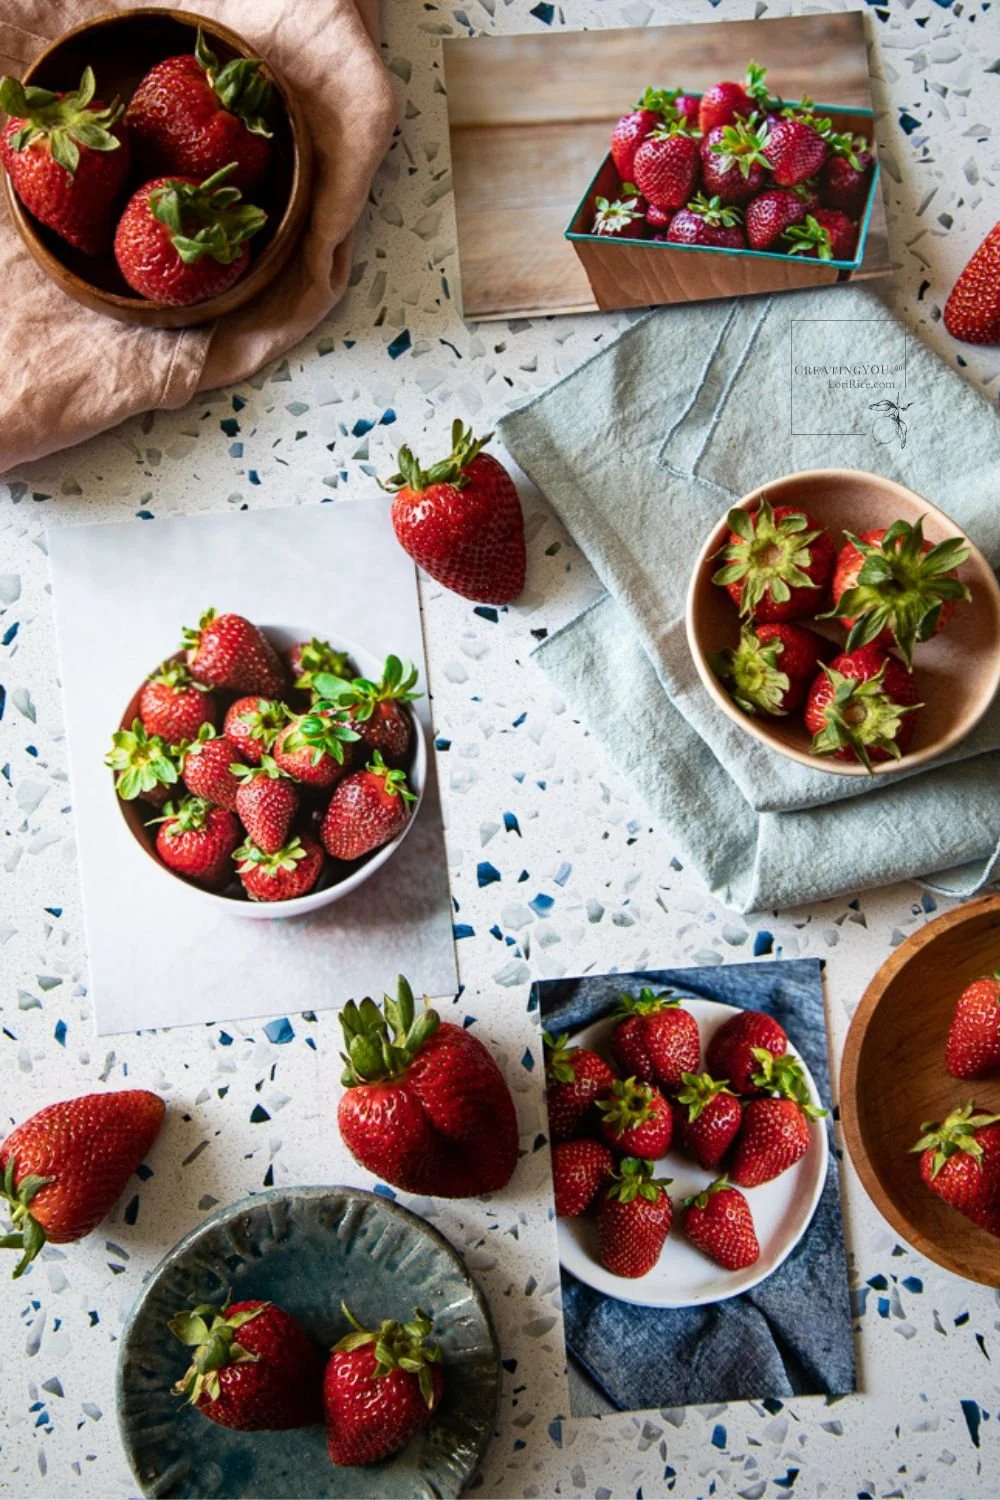
How many different images can I envision for using this piece of pottery?

It’s important to me that I can use a prop in many photos without those photos looking exactly the same. So before I finally click buy, I try to envision all the ways I could use it. Different foods - salads, desserts, snacks, main courses. Different surfaces - wood, white, gray canvas, white wood, metal. Multiple linens and colors - grays, beige, white, blue, gray, teal. Differently lit settings and camera angles - backlight, sidelight, overhead shots.

If I can only think of one or two ways I’d actually use the piece, it’s likely not the best purchase, unless I have some extra funds in the prop budget set aside and I want to have some fun with my collection.

This all doesn’t mean that I don’t buy a piece from time to time that would be a bit wild and crazy by these standards. That’s what makes a collection unique. But when I want my budget to go the furthest for my photography work, the five questions for evaluation of my purchase listed here are applied. 


I want to be part of a positive, supportive food photography community. Keep me updated!

10 Ways to Photography Banana Bread
tags: pottery, food props
categories: Photography Props
Wednesday 11.27.19
Posted by Lori Rice
 

6 Types of Linens to Diversify Your Prop Collection

Linens for food photography

I have a couple Etsy affiliate links in this post. This means that if you check them out and decide to purchase, I earn a very small commission. Thank you!

Do you find yourself using the same linen over and over again in your photos because you know it works?

I hear you. I get stuck in a linen rut, too. 

And let me explain here. When I say linen, I’m speaking of the napkin, towel, tablecloth or other similar prop used to enhance a food or product photograph. 

It’s so easy to default to what we know will work. We tend to stop challenging ourselves to work with new props to save time or create a cohesive look in our work. 

But there are ways to diversify your linen napkin collection so that you have a handful of options that are fail-proof for your shots. 

Additional touches in design and multiple colors can help add a twist to your photos while keeping them in line with your photography style. 

You might choose two or three go-to styles. Or use a different one in each shot. 

I’m sharing 6 types of linens in my collection that are solid options for me time and time again. 

Real linen 
I talk about this all the time. Real linen in gray or oatmeal are the core of my collection. 

Rough edge
Fray, tassels, tears. Any hint of creativity along the edge of a linen will add character to your scene. 

Flour sacks
Simple, affordable, and perfect for food photos. You can buy them in white and dye them with t-shirt dye in whatever color you desire. I’ve also found them in the kitchen section of stores in light to medium gray and with prints.

Handkerchiefs
I discovered all these wonderful options at my local craft store. This is often how I add prints to my photos, giving them a unique look that many people are afraid to experiment with. But it works! And they’ll set you back about $1 each. 

Cheesecloth
Beautiful in photos of all kinds. Use it straight from the package for a clean, crisp look. Wash and air dry it for a relaxed feel. I have it in natural, white, and black. 

Waffle
A waffle texture is a safe place to start if you aren’t ready to jump into prints because it adds a different look without multiple colors. Many traditional dish towels and washcloths have this look, but there are also plenty of cloth napkins with waffle texture, especially in the fall and winter design releases.


If you are looking for some new linens, these are a couple of my very favorite makers:

Lakeshore Linens

112 James Street

I also find good options when I occasionally swing by these stores:

CB2
Crate & Barrel Outlet
H&M Home

Everything else I’ve found by exploring random stores while traveling both in the U.S. and abroad. A new linen is one of the easiest souvenirs to fly home with.

Love this content, Keep me updated.
10 Ways to Photography Banana Bread
Featured
lori-rice-5378.jpg
Sep 5, 2025
Midweek Reset Ritual: A Screen-Free Practice to Boost Your Business Clarity
Sep 5, 2025
Sep 5, 2025
Copy of Copy of Diptych (15).jpg
Jul 24, 2025
My Favorite Styling Tools, Travel Essentials & Camera Gear (Minimal + Proven)
Jul 24, 2025
Jul 24, 2025
3.jpg
Jul 10, 2025
How to Grow a Creative Business Without Niching Down
Jul 10, 2025
Jul 10, 2025
tags: linens, napkins, food props, food styling
categories: Styling Tips, Photography Props
Thursday 11.14.19
Posted by Lori Rice
Comments: 1
 
Newer / Older

Our Privacy Policy and Terms of Sale. ©2025 Fake Food Free Productions, LLC.