• HOME
  • Portfolio
  • Club CreatingYOU.®
  • About
  • Cookbooks
  • Blog
  • Search

Lori Rice

Photography | Styling

  • HOME
  • Portfolio
  • Club CreatingYOU.®
  • About
  • Cookbooks
  • Blog
  • Search

Thrifting for glassware tips

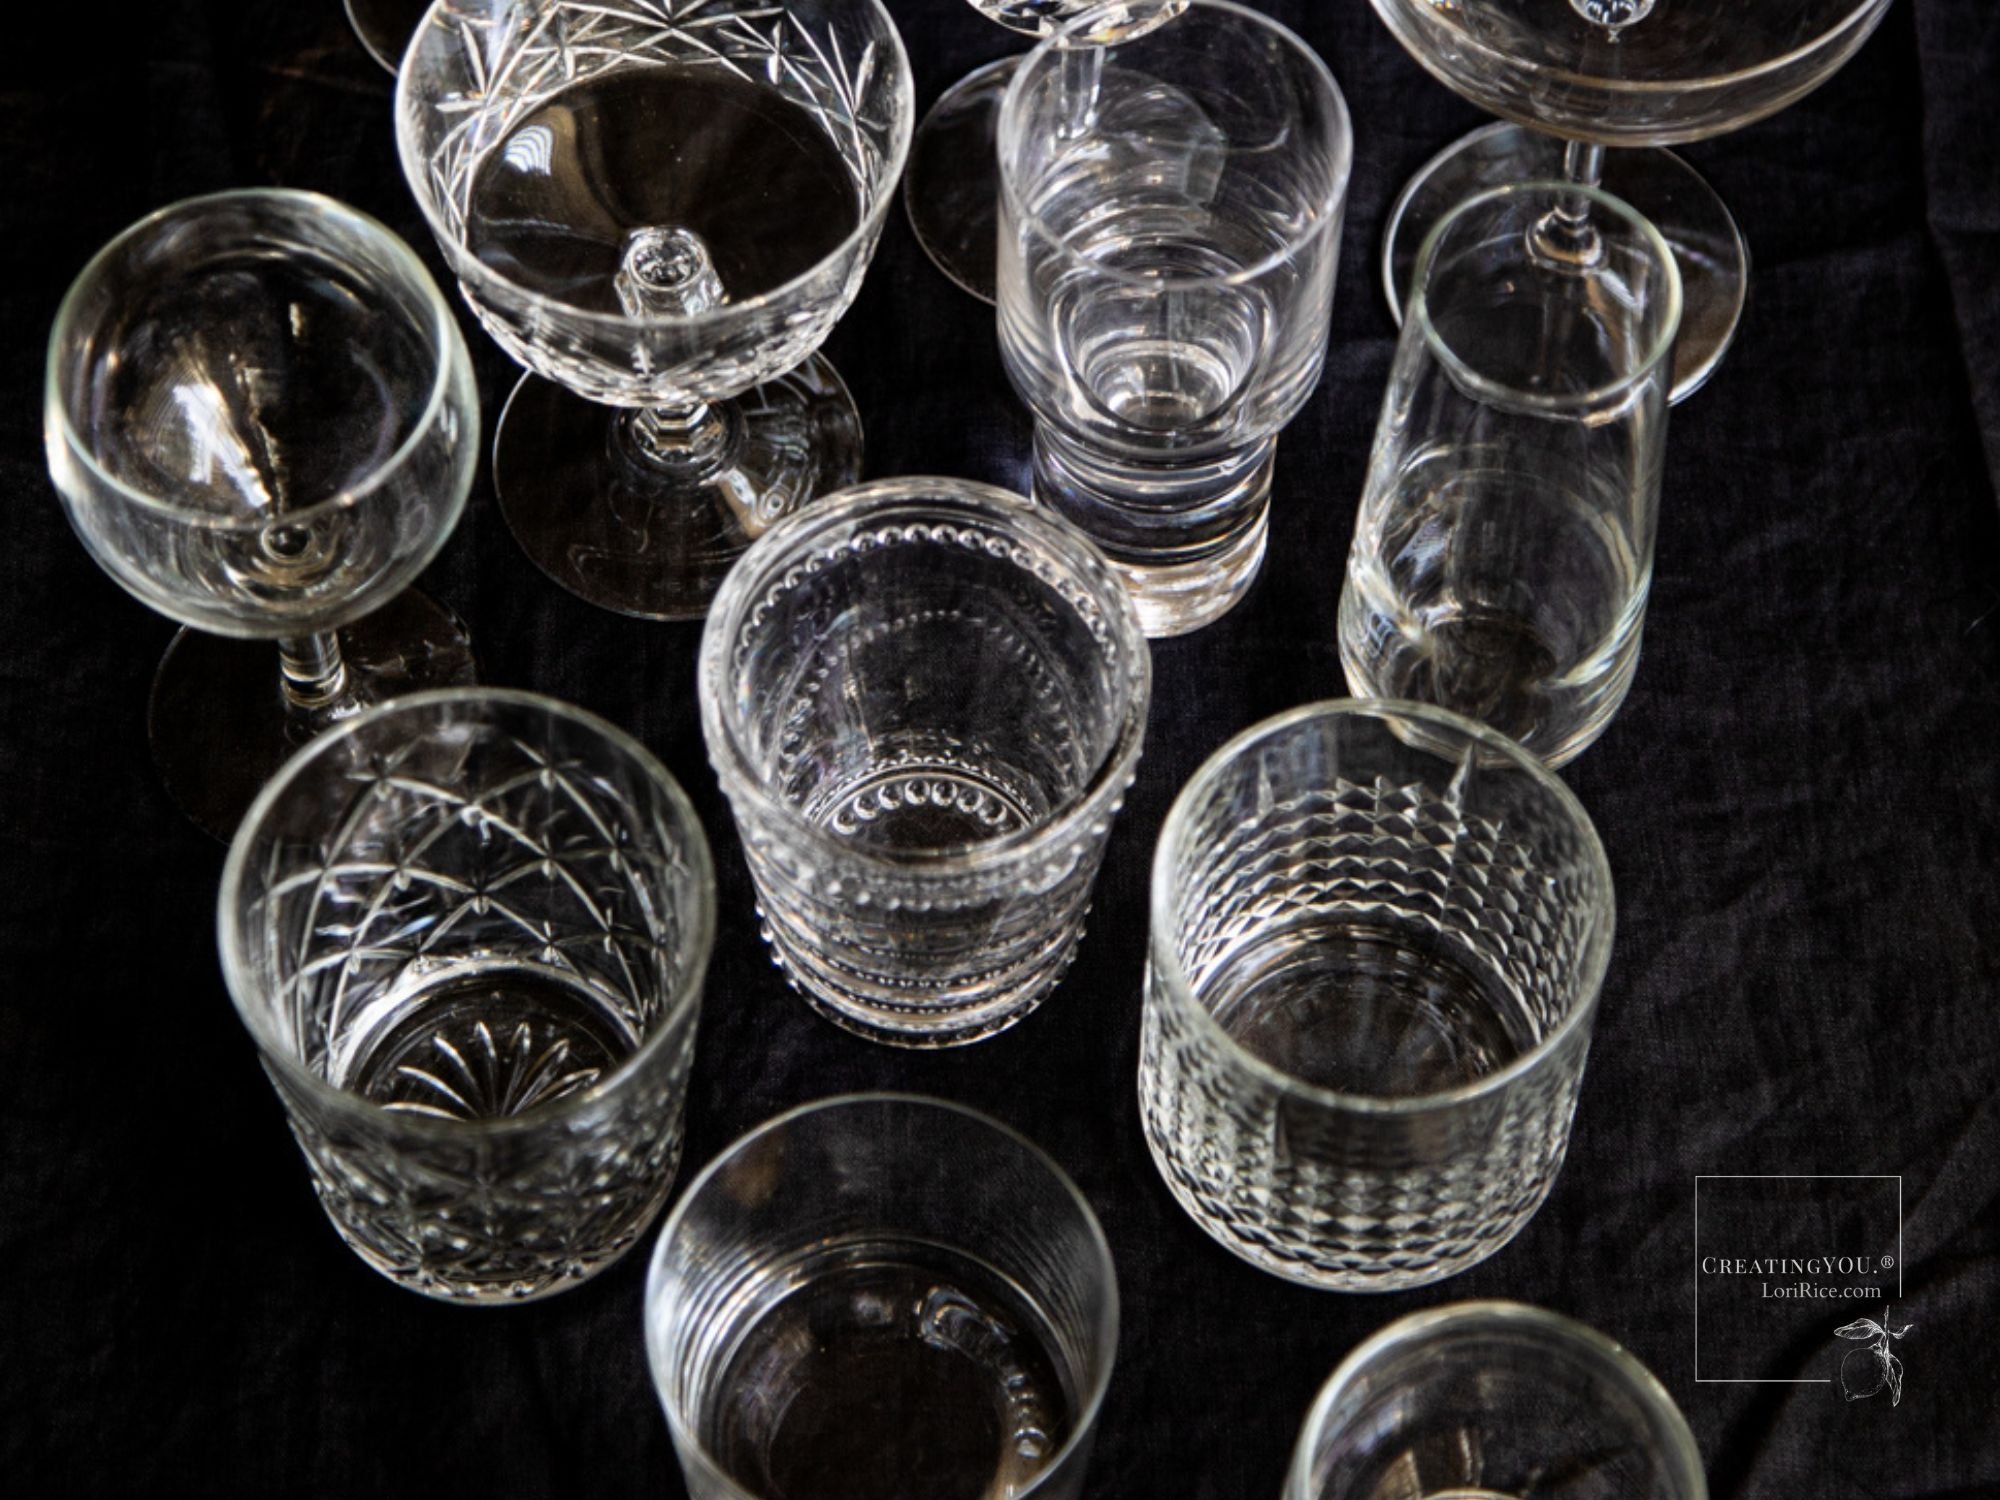
If you told me I could only keep one type of prop in my collection for food and drink photography, I wouldn’t hesitate with my answer - glassware. I love glasses and many in my collection are from thrift stores. Others are upcycled from former bottles. The remaining come from sales at home stores. 

I’m selective when thrifting for glassware, though. I know what will and won’t make a good photo (meaning it aligns with my personal style) and I know what I will and won’t use the most. This skill comes from much trial and error. 

I’ve made many purchases that resulted in a glass sitting on my prop shelf without use. Because my studio and office are one room in my home, I don’t want those things taking up valuable space. To avoid this, first I refer to the questions I always ask myself before buying a new prop. 

Once those are answered, I consider the following things for glassware. Use them as tips when you are thrifting or shopping for your own. 


Tall and narrow - Tall, narrow glasses that aren’t too thick or bulk are great for cocktails, sodas, and smoothies. They are especially ideal when you want to show off a garnish because it stands out amidst the smaller diameter on the surface of the drink. 


Coupes of all kinds - Coupes are my favorite style of glass and that might be because manhattans and martinis are my favorite cocktails. I look for those with slightly different top edges - curled in, u-shaped, or squared off. They are also good for champagne. I find them much easier to photograph than tall, stemmed flutes. 


Careful with color - I do have a few colored or tinted and solid glasses. If I used a lot of bold color in my photography, I might have more. For now, I find two or three is enough. I like light tints so you can still see the drink and I always make sure the colors will work with other props I have. If the glasses are not transparent, I make sure I have an idea for use that includes a drink with an interesting visible top layer. 

More than one shape for wine - I rarely photograph standard stemmed wine glasses. I find them difficult to fit into most scenes I create. I do look for unusual shapes, though, and lots of stemless. Tasters work well for wine, too, especially to place around snack boards. 


Clean etched patterns - I love creating shadows with natural light and there is nothing like a beautiful etched pattern in a glass paired with the right time of day to create an original photo that can’t be replicated. I look for clean patterns, grids and sharp angles versus swirls or floral. 

Taster styles - It’s hard for me to turn down a small, taster-like glass. Not shot glasses, but those that might be used for craft beer, water, or spirit tastings. I look for interesting shapes. They work well when keeping the props on my set proportional. 

Too ornate is out - Large knobs of glass in the stem or swirly, floral etching rarely work for me. These might be your style and if so, go for it. But I know they aren’t mine. I’d have a difficult time using the glass in multiple photos, and I’d risk making my photos look dated. 


Singles or sets - When thrifting, it’s common to find glasses in full sets of 4 or 6. I have purchased a set of 6 because I loved the glass so much, but more often, it’s not worth it. The set takes up a lot of space, especially if you find yourself only using 1 to 3 of the same glasses all the time. It’s a tough decision, though, and one that can only be made by considering how unique or rare the glass is and how much storage space you have available. 


Featured
Figs.png
photography props, linens
Photography Props
Food and Product Photography Linens
photography props, linens
Photography Props
photography props, linens
Photography Props
6 Types of Linens to Diversify Your Prop Collection
linens, napkins, food props, food styling
Styling Tips, Photography Props
6 Types of Linens to Diversify Your Prop Collection
linens, napkins, food props, food styling
Styling Tips, Photography Props
linens, napkins, food props, food styling
Styling Tips, Photography Props
Content Link Block
Select a page and create a visual link to it. Learn more
Blog

Need some quick tips for creating your photos? I’m here to help with 12 years of experience as a solo stylist-photographer working with agriculture boards, brands, and publishers from my home studio. Be sure to grab my free CreatingYOU.® training:
5 Steps to Better Food and Product Photography 


tags: props, photography props, drink photography
categories: Photography Props
Tuesday 02.11.25
Posted by Lori Rice
 

Simple Drink Photography and Styling Tips

Drink styling and photography tips from Lori Rice

Throughout the last part of 2022 I found myself drawn much more to photographing drinks versus food for my own creative work. And not just cocktails, but juices and smoothies, too. I shoot this sort of thing for clients occasionally, but when I set aside a day for myself, just to create, I find my thoughts going to drinks. These are three drink photography and styling tips I apply to my own work that might help you if you are photographing beverages or highlighting the drinkware or garnishes of beverages.


Find a creative point of focus.

This is most often a garnish, but it doesn’t always have to be. When you are using garnishes, though, remember that they’re for more than just cocktails. Edible flowers and microgreens add a nice touch to smoothies. 


Cocktail garnishes don’t have to be complex. A fresh herb, fresh or dried slice of citrus, or a big edible flower adds color contrast and texture for your hero spot of focus. 


Layered drinks and milky swirled coffees don’t need a garnish at all. Make that drama the focus point of your shot. 


Define the drink with your styling and creative lighting. 

Drink styling for photography from Lori Rice

A mason jar tea? Squeeze that jar in the shot. A simple, clean smoothie may need no other propping. Work sliced fruit into the side a mocktail glass. Show some matcha powder. Include the cocktail tools. Capture a bubbly pour. 

Taped or real windowpanes, plants in your light source, and lace curtains or curtain edges allow you to play with the light on your set to reflect an early sunrise or an evening cocktail hour. I’ve previously shared how I create interesting light patterns with natural light, season, and time of day.  

Backlight creates dramatic drink photos, but don’t commit to it. 

The light source behind your drink creates a dramatic drink photo, but don’t be afraid to switch that up for new moods. It’s also not always the best light direction when you are trying to highlight a garnish because that shadow falls to the front of the drink which is often the point of focus for a garnish. For pretty garnishes, I find side light to be a better option. (Turn the garnish, your hero spot, towards your light source.)

Free Resources to help your food and product photography
tags: drink photography, styling, photography
categories: Styling Tips
Wednesday 01.11.23
Posted by Lori Rice
 

Best Beers for Food Photography

No time to read? You can listen to this post instead. Just click the play button.

When a beer style is not the focus of my shot and the drink is a supporting factor in the scene, I like to make things easier on myself. 

After shooting two of my own cookbooks that included beer in almost every shot, Food on Tap and Beer Bread, I’ve learned quite a bit about which beers will allow me to quickly nail a shot and which are going to need some extra care to capture well.

I choose a beer for food photography that holds its freshly poured look. Some beers are much better for that than others. When I’m simply adding beers to my shots and not showing off a particular beer brand or style, I tend to steer away from craft styles and take advantage of more widely produced beers. 

Best-Beers-for-Food-Photography-Lori-Rice.jpg

This is because 1)  they are often styles that hold their head or collar longer, and 2)  they are less expensive and I can afford to pour and pour until I get exactly the shot I want. 


Have a dream of photographing your own cookbook like I did? Be sure to grab the free audio download Top Expert & Industry Tips for Photographing Your Own Cookbook!


My favorites:


Stouts. Specifically nitro stouts and if it is in a can with a widget, even better. Yes, I’m talking Guinness here. If I could shoot with one stout all day long, this would be it. When you pour hard, that head will hold for what seems like hours compared to other beers. You can take shots to your heart's content and you’ll have your pick of several favorites in the end. 


Porters. A style very similar to stouts. Many porters will have a nice, long-lasting collar as well. 


American Light Lagers. The cheaper the better. You’ll need to pour hard and then let the head settle. It will fade much faster than a stout. The benefit is that you can use techniques to re-foam the beer, then dump and pour until you snag your shot without the worry that you are wasting something expensive or special.


Hefeweizen. If you are wanting a thicker, creamier look to your beer, versus a clear, light lager, try shooting with a hefeweizen from the imported section of the beer department. The foamy head tends to last somewhere between the time frame of a stout and light lager. 


Additionally, when shooting beer, I keep these two things in mind. 

Don’t try to create something that doesn’t exist. Many beers have foam heads that are either non-existent or that last a split second after being poured. Many brown ales and juice or hazy IPAs come to mind. 

Capture the beer as it would be served to you. There is no need to stress about trying to create and hold a foam head when there was never one for that style there in the first place. 


Use a beer-clean glass, regardless of the style or size of glass you use. If you don’t know what that is, I love this graphic from Cicerone.org where I have my Beer Server Certification. It shows the difference between a dirty and clean glass when it comes to the visibility of a beer. 


tags: beer photography, drink photography
categories: Styling Tips
Thursday 10.08.20
Posted by Lori Rice
 
Newer / Older

Our Privacy Policy and Terms of Sale. ©2025 Fake Food Free Productions, LLC.