• HOME
  • Portfolio
  • Club CreatingYOU.®
  • About
  • Cookbooks
  • Blog
  • Search

Lori Rice

Photography | Styling

  • HOME
  • Portfolio
  • Club CreatingYOU.®
  • About
  • Cookbooks
  • Blog
  • Search

In Defense of Natural Light Food Photography

The Internet is a funny thing. It seems like when we really start to lean one direction for our work, say with natural light food photography, its sensors pick up on that and everything in our path from ads to forum comments stack up against us. 

When it comes to being a natural light photographer, I’ve heard it all. Things like, you’re not a professional photographer if you use only natural light. This one makes me laugh because I can’t remember the last time that I saw a nature photographer haul a big light out on their 10-mile hike or a wedding photography assistant carrying a light around from person to person during a ceremony. Are they not professionals?

I’ve also seen ads on Instagram about how wrong people were to use natural light and how their course using artificial light changed their worlds. I think that’s great - for them. Not for everyone. 

Let’s just get clear on one thing - there are lots of types of photography, lots of light options that can be used in each, and none of your choices make you better, worse, or less professional than anyone else. 

It’s about doing what YOU do. Don’t let people make you feel inferior based on how you choose to work. 

If you are here learning from me I expect two things to be true. 

You enjoy photographing with natural light and/or you know that what I teach here in terms of styling and camera use is applicable whether your light is in a window or plugged into a wall. 

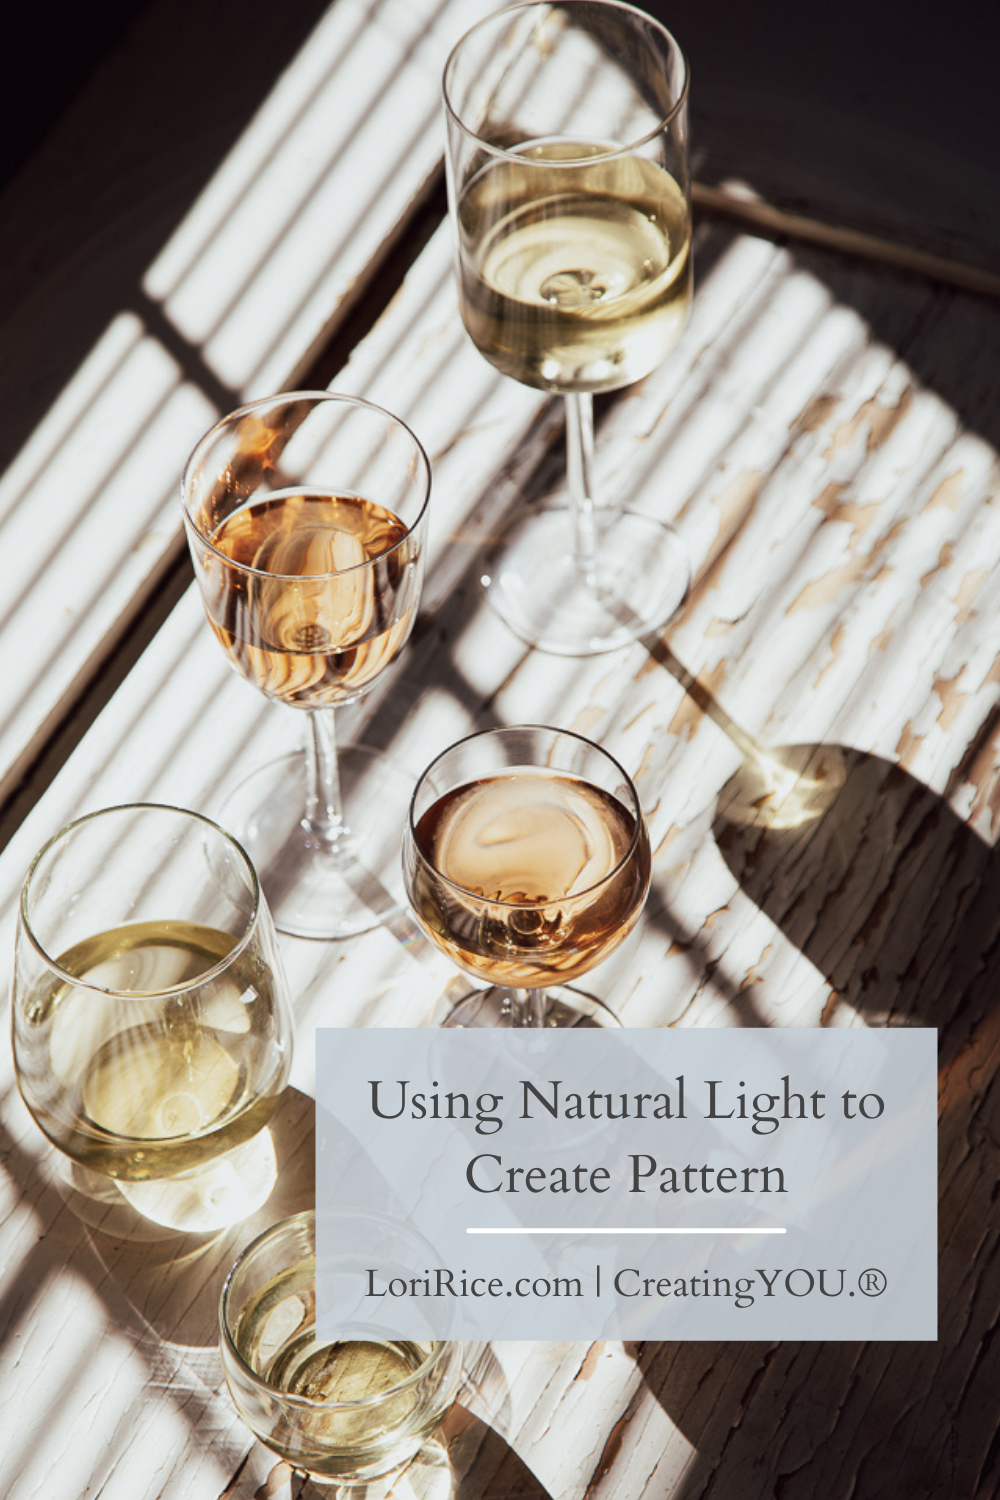
I’m going to share some practical reasons why natural light can be a good choice along with a few things to consider when choosing it.

Then I’m going to share why I’ve chosen to stick with it throughout my career over these past 12 years. 

  • It’s great for small spaces. Gear can fill up a space fast making working in it more frustrating. 

  • It’s budget-friendly. The less extra gear I have to buy, the more I can invest in my camera bodies and experiment with new lenses. 

  • When controlled well, it creates beautiful, natural images. 

  • It requires flexibility. I show you in Confused to Confident how to shoot all day long with natural light. But obviously, you can’t photograph at 10pm. Well, unless you are in special places like Alaska some parts of the year. 

  • You have to change with the seasons. I work longer days in the summer and shorter in the winter. 

  • Natural light works better for me when I’m without a tripod and can move to capture the best angle.

But this is really why I choose to use it 95% of the time. 

Unlike a lot of other people, I’m not trying to convince you one way or the other. You can use both natural and artificial light, or work mainly with one or the other. And your goals for your work will have an impact on the best choice.

Just remember that your work, is your work. How you choose to get to a final photo shouldn’t be the basis for how professional or good you are at what you do. And when you choose one way to work, always remember it’s okay if that changes over time. 


Ready to learn some more?

Take me to some freebies

 
Featured
In Defense of Natural Light Food and Drink Photography.png
Photography Style
natural light, photography, food photography
In Defense of Natural Light Food Photography
Photography Style
natural light, photography, food photography
Photography Style
natural light, photography, food photography
Using Natural Light to Create Pattern.png
Photography Tips
natural light, photography tips, food photography, product photography
How to Create Patterns With Natural Light for Food and Product Photography
Photography Tips
natural light, photography tips, food photography, product photography
Photography Tips
natural light, photography tips, food photography, product photography
tags: natural light, photography, food photography
categories: Photography Style
Monday 05.01.23
Posted by Lori Rice
 

Tips for Photographing Meat

meat photography

I’m back with another photo breakdown and discussion. Thanks so much for the great feedback from my CreatingYOU.® newsletter on the last breakdown. I’m so glad to hear that you find these helpful.

I’m gearing up to knock out a lot of photos for The California Farm Table Cookbook that will include meat, eggs, and dairy. So let’s break down some photos with meat.

We’re going to take a look at a photo of marinated chicken thighs that I took several years ago. I’ll tell you what I would do differently now and then show you how I’ve applied those tips to more recent photos. We’ve got chicken, steak, ground beef, and duck all in this little 13-minute session. Watch and listen below!


If you missed my last photo review and breakdown, it was on props and proportions.

 
Don't miss the next Photo Review - Join the CreatingYou.® Email List Right here
tags: food photography, food styling, photo review
categories: Photography Tips
Friday 03.17.23
Posted by Lori Rice
 

15 Props for Food and Product Photography

In the past 10 years, I went from a photographer who hated the idea shelves stacked with a clutter of props to a food and product photography prop LOVER. I can’t see anything - a cup, a spoon, or even a salt shaker - without envisioning a photo.

I try to be cautious of repetitively using the same items to prop my food and product photos. But there are some that I love so much. I just have to have them around. 


These are a few things that make it to set with me for nearly all my shots with examples of them in food, candle, and flower photos. I hope they give you some creative ideas for things to keep around your set.  

1.png 2.png 3.png 4.png 5.png 6.png 7.png 8.png 9.png 10.png 11.png 12.png 13.png 14.png 15.png
 
Original Food Photography Surfaces for Small Spaces - Grab the free training!
 
tags: photo props, food styling, product photography
categories: Photography Props
Thursday 03.09.23
Posted by Lori Rice
 

Photo Review: Proportions

I have nearly 60,000 photos in my archives. They are made up of client images, creative work, and travel. Some I love, others I hate, and some are good, I would just do things a little differently today. In this 9-minute video, we’re going to go through a photo review.

In the review, I’ll tell you what I would change in a photo from 7 years ago, and tell you what works about a photo I took more recently.

In these short photo reviews, we’ll cover some important parts of styling your set so that you can keep your eye out for common problems that you might not catch right away.

Get more tips like this: CreatingYOU.® Newsletter
tags: styling, photo review
categories: Styling Tips
Wednesday 02.08.23
Posted by Lori Rice
 

Simple Drink Photography and Styling Tips

Drink styling and photography tips from Lori Rice

Throughout the last part of 2022 I found myself drawn much more to photographing drinks versus food for my own creative work. And not just cocktails, but juices and smoothies, too. I shoot this sort of thing for clients occasionally, but when I set aside a day for myself, just to create, I find my thoughts going to drinks. These are three drink photography and styling tips I apply to my own work that might help you if you are photographing beverages or highlighting the drinkware or garnishes of beverages.


Find a creative point of focus.

This is most often a garnish, but it doesn’t always have to be. When you are using garnishes, though, remember that they’re for more than just cocktails. Edible flowers and microgreens add a nice touch to smoothies. 


Cocktail garnishes don’t have to be complex. A fresh herb, fresh or dried slice of citrus, or a big edible flower adds color contrast and texture for your hero spot of focus. 


Layered drinks and milky swirled coffees don’t need a garnish at all. Make that drama the focus point of your shot. 


Define the drink with your styling and creative lighting. 

Drink styling for photography from Lori Rice

A mason jar tea? Squeeze that jar in the shot. A simple, clean smoothie may need no other propping. Work sliced fruit into the side a mocktail glass. Show some matcha powder. Include the cocktail tools. Capture a bubbly pour. 

Taped or real windowpanes, plants in your light source, and lace curtains or curtain edges allow you to play with the light on your set to reflect an early sunrise or an evening cocktail hour. I’ve previously shared how I create interesting light patterns with natural light, season, and time of day.  

Backlight creates dramatic drink photos, but don’t commit to it. 

The light source behind your drink creates a dramatic drink photo, but don’t be afraid to switch that up for new moods. It’s also not always the best light direction when you are trying to highlight a garnish because that shadow falls to the front of the drink which is often the point of focus for a garnish. For pretty garnishes, I find side light to be a better option. (Turn the garnish, your hero spot, towards your light source.)

Free Resources to help your food and product photography
tags: drink photography, styling, photography
categories: Styling Tips
Wednesday 01.11.23
Posted by Lori Rice
 
Newer / Older

Our Privacy Policy and Terms of Sale. ©2025 Fake Food Free Productions, LLC.